Showing posts with label buttoning. Show all posts

Saturday 25 November 2017

Isaiah 9 - Unto us a Son is Born Quiet Book Page

In Isaiah chapter 9, a prediction of the Messiah's birth occurs.

Memory Verse: "For unto us a Child is born, Unto us a Son is given; And the government will be upon His shoulder. And His name will be called Wonderful, Counselor, Mighty God, Everlasting Father, Prince of Peace." Isaiah 9:6

Materials needed to create Unto Us a Son is Born quiet book page:

  • A4 felt background sheet. I used mid blue.
  • purple ribbon scrap
  • felt scraps in white, gray, yellow, orange, straw, dark brown, mid brown, tan, and various purples
  • a yellow/gold shank button with a loop back - this is too accommodate the thickness of four layers of felt used on the star
  • sewing thread to best match the page
  • scissors
  • the free template available from A Felt Nativity Story by Stay at Home Educator 
  • my free template - which includes the extra pieces missing from A Felt Nativity Story by Stay at Home Educator as an added bonus! Most of them are untested, but I am confident they will work - I have made a few templates in my time.

From the felt nativity story template, I used Joseph's body for both Joseph and Mary. I used two of the wise men's clothes for them because they are easily able to be adapted to form pockets to enable cuddling of Baby Jesus. First cut out one of all the pieces and arrange them on your page to make sure they fit. You will need to adapt your pieces somewhat to be able to form a pocket with Mary and Joseph's clothes. I will try to explain adequately below.


Baby Jesus: sew down the pieces for baby Jesus in the order of face followed by swaddling onto a doubled layer white background. When you have gone around the saddling, sew around his head on the white felt. Cut around the edge leaving a white border around Baby Jesus' head.

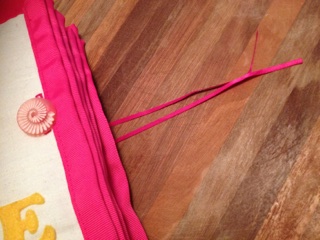
Manger: sew down the pieces for the manger and straw in that order onto a sheet of felt the same colour as the manger. I used chocolate brown. Then cut it out. Pin it to the page and cut a length of purple ribbon for a blanket and melt the ends with a match to prevent fraying. Pin it in position so it will fold over baby Jesus and form a blanket. Unpin the manger and sew down the ribbon at the bottom edge where it won't be seen under the manger. Then re-position the manger and sew it down around the outside edge leaving the top straw side open to form a pocket for baby Jesus to sleep in.


Star of David Sun: first choose the size appropriate for your button and cut out one star and sew it down to the same yellow felt. Cut it out after sewing it down. Then cut out the corresponding sized circle out of orange felt and layer a piece of orange felt topped by the Star of David and the circle of orange felt on top of that.


Sew down the circle. Sew the appropriate sized button hole onto a scrap piece of felt so you can mark with sewing pins on your sun where to start your button hole.


Sew a buttonhole the appropriate size for your button in the middle of your star and open it up with a seam ripper.


Then cut out the star by cutting the bottom orange layer by following the circle shape at the top. Fold back the yellow star points as you cut around so you don't cut them off. Hand sew the shank button to your page. Button on the sun.

Mary: Use a few of your pieces to line up Mary again, and sew down the back of her head covering and then her body on top. The photo is to show the positioning - not which sections to sew down.


Sew down the two purple pieces onto a white sheet of felt. Position the body piece template over the top and use it to cut out the shape of her dress. Then trim the section of white from around the shoulder area and continue down along the purple to the bottom edge. See below.


Pin the dress on top and sew matching your thread to the white and purple sections. Stop at the spot where the purple cuts across Mary's chest to form a pocket opening so Mary can cuddle baby Jesus.


Next sew down Mary's head and hair. Sew her front head covering down onto the same white sheet of felt it was cut from so it is double thickness. Cut it out and then sew it down along the outside edge.

Joseph: When cutting out Joseph's clothes, cut off one shoulder from the Y shaped pattern pieces. When you cut out the pieces out of felt, extend the length of the pieces you cut off from the Y shape so they extend underneath the other and into the pocket.

Position and sew the back of Joseph's head covering, followed by his body. Then sew down the extended shoulder pieces the go underneath Joseph's outer robe into the pocket. Sew down his head and hair.

Similar to Mary, sew down the two purple pieces on top of each other onto a grey sheet of felt. Position the body piece template over the top and use it to cut out the shape of his robe. Then trim the section of grey from around the shoulder area and continue down along the purple to the bottom edge. Pin the robe on top of his body and sew matching your thread to the grey and purple sections. Stop at a spot a little below where the purple cuts across Joseph's chest to form a pocket opening so he can cuddle baby Jesus too. Why is it always Mary that gets all the cuddles? I'm sure Joseph tried to be a good Step-Dad and gave Jesus plenty of cuddles.

Lastly, Sew down the front of his head covering onto another gray sheet of felt to double it up so it is strong. Then cut it out and position it, sewing only along the outer edge.


Finished!

Difficulty Level = Intermediate.

However - A Felt Nativity Story board by Stay at Home Educator is easy! I included the missing pieces in my free template above.

Key Learning Areas and Skills

  • Isaiah 9 - This page tells about how God told Isaiah about the birth of the Messiah around 500 years before the fact - He came from Royal lineage as predicted
  • Imaginative Play - The baby can have cuddles with Mummy and Daddy, wear His crown/halo, and sleep in His royal-blanky bed
  • Tucking - Tuck baby Jesus into his manger-bed and tack the blanket in over the top
  • Buttoning - Button and un-button the sun
  • Shapes - Learn the shape of a Star of David and sun
  • Fine Motor Skills - all quiet books encourage fine motor skill development
  • Hand-eye Co-ordination - all quiet books encourage hand-eye co-ordination


Read the Chapter

Isaiah 9

Devotional

Isaiah prophesied Jesus birth around 600-700 years before the event.

Jesus is the sun of righteousness mentioned in this chapter. I made a Star of David shaped sun that can be buttoned on and off the page - and can be used as an impromptu crown or halo on Jesus' head.

This quiet book page features a lot of purple - because the government will be on His shoulders and that is the Royal colour. I gave Jesus a purple blanket for the same reason. It kinda annoys me when they picture Him in prickly hay. As if his Mama wouldn't put a blanky down first!!

Both Mary and Joseph are descendants of King David (government) - although Joseph was a descendant through the line of Jeconiah and therefore not eligible to be a forebear of the Messiah. I will write about that in another devotional, however.

Which brings me to the next part of this devotional... hidden information regarding the virgin birth.

There are countless fascinating things to discover when you start studying the Bible. You might be frightened that you will learn everything there is to know, but you are quite safe to believe you will never get to that stage. The Holy Spirit has inspired so many secret layers of meaning (that probably the original writers did not even realize they were hiding in the writing) that we will never run out of learning.


Image source

There are two ways of writing the Hebrew letter mem - 'M' in English. they are called an open mem and a closed mem, referring to the gap or no gap formed in the letter when writing it. Correct Hebrew grammar rules that the closed mem is only ever used at the end of a word. Theses rules are followed everywhere in the Bible except in one word in a passage in Isaiah 9.  If you are curious as to why the rule is broken here and how that is significant to the prophecy of Jesus' virgin birth, please read this article from JewishRoots.net and even if you don't read the whole article - make sure you follow the link in the article to a two and a bit page PDF entitled The Mystery of the Closed Mem by Daniel Botkin. It is large writing and an easy read, and WELL worth it!


For unto us A Child is Born - Handel's Messiah

Tahlia had fun pretending to conduct the orchestra and choir for this clip!!


Follow Faith and Felt Obsession on FacebookPinterest and You Tube

Do you imagine a blankie in the manger too?

Sunday 13 August 2017

Luke 12 - Where is Your Treasure? Quiet Book Page

In Luke chapter 12, Jesus talks a lot about possessions, and what they say about our priorities.


Memory Verse: "For where your treasure is, there your heart will be also." Luke:12:34

Materials needed to create the Where is Your Treasure? quiet book page:

  • A4 felt background sheet. I used pink.
  • felt scraps
  • ribbon
  • large heart button
  • trinkets for the treasure inside
  • sewing threads to match ribbon
  • the treasure chest template by Stephanie from Imagine Our Life
I'm not going to give a detailed explanation here because Stephanie has already done a tutorial on how to make the chest in her post. Of course you will need to make the loop of ribbon on the lid large enough to fit over your heart button, and sew the heart button in place on the bottom piece.

It is important to sew the chest pieces using a colour thread that matches the ribbon rather than the felt so that when you sew the pieces onto the page and you go over the ribbon it doesn't look funny. That's my opinion anyway.

Finished!

Difficulty Level = Intermediate

Getting the loop right is probably the most difficult section.

Key Learning Areas and Skills

  • Luke 12 - This page tells the story of how it is better to store our treasure in Heaven, because on Earth our treasure can easily get stolen or ruined
  • Imaginative Play - who doesn't like to find treasure!
  • Buttoning - Opening and closing the treasure chest
  • Fine Motor Skills - all quiet books encourage fine motor skill development
  • Hand-eye Co-ordination - all quiet books encourage hand-eye co-ordination

Read the Chapter

Luke 12

Devotional

As I was reading this chapter and wondering what to write the devotional on, one thing stuck out to me.  A man asked Jesus to tell his brother to share the inheritance with him. Jesus doesn't. Actually, he reproves both men with one story. A man had a bountiful crop and no-where to store it, so he decided to build new barns so he could store it all up for himself and sit back and relax and not work anymore. Instead he dies that night and who knows who got to enjoy his bountiful crop. Jesus' point was that it is better to share what extra we have rather than trusting in our possessions to look after us. We can't look after ourselves by having lots of possessions anyway. For all we know, we will die tomorrow, and no amount of goods can change that.

The inheritance cannot save either of them, but God is the one who will meet their needs. And we can trust Him to because he values us much more than the sparrows, whom he never forgets. Life is about more than food and clothes, and God will ensure he looks after the basics if we stop chasing after them like madmen and take time to focus on the important things, like seeking the Kingdom of God and looking after others.

I used to be enthralled with the idea of self sufficiency. As I have grown older, I have begun to realize that self sufficiency is impossible. No one can grow and make everything they need. It takes too much effort and too much skill. Some climates are not suitable to grow certain things. We can do without a lot, but even so, I get exhausted thinking about everything I would have to do if I wanted to be self sufficient.

God created family and community so that we could support each other. We are supposed to need each other because that teaches us that we can't supply everything we need, and that we need to rely on God. The village baker and the village candlestick maker had very different jobs, but if you had a village full of butchers/bakers/candlestick makers (and every other job-ers), there would be a village full of hungry people with no working tools.

If we all focused on what God has given us that we could share with others and we would all benefit from the best of everything.


That man had a chance to ask the Lord of the Universe a question, and he blew it on "tell my brother to share the inheritance". I hope I would ask a more meaningful question than that, and receive an answer I could treasure.


Follow Faith and Felt Obsession on FacebookPinterest and You Tube

Where is your treasure?

Thursday 9 February 2017

Up-cycled Clothes Quiet Book

After seeing this "Close Your Clothes" quiet book by Anna of Forty-Two Roads, I knew I had to feed my quiet book obsession and make one. Ok, two of them! This is my version, sans poem, and with a little Aussie flavour.


I made one book for Tahlia and one for my niece Vashti for this last Christmas. They are very similar but a little different in places, so I tried to put the related pages next to each other in the photos, although they are not in the same order in both books due to the page colours clashing.


I thought that a belt would be great for the cover as we could use it to keep the books shut.


These pages feature a bow tie that clips together at the back of the collar. You can lift the collar to put it on and then fold it back down once the tie has been clipped together.


These page features the all popular netball skirt. Netball is very popular in country areas of Australia. Netball skirts are wrap around skirts and are adjustable to to your particular waist size because they fasten using a rail belt slider and adjuster. I never knew what they were called until I started writing this post and had to find out!


These pages feature overall clips/buckles. They are not as common as they were in the Eighties lol


These pages feature press studs. The other activity for these pages is pulling the arms and legs inside out so they fit inside the book for storage (see below).


There are hidden bras behind the tops. One bra has a front clasp and the other has padding which can be rather easily removed and put back in.

The baby jumpsuit is located here so that the baby would have ready access to breastmilk :)


The center pages feature a button-up dress or skirt and hat clips.


These pages feature hook and eye closures. I guess this is not the book I will be taking along to church hahaha... lingerie might be better suited to the car or home!


These pages feature zips. I made sure to have them unsecured at the bottom so the girls could learn to thread the zip themselves.


These pages feature Chinese knot buttons. I think they turned out quite pretty.


The last pages feature lacing. One of the books received a bonus belt clip too. I did find it a little difficult finding two of everything I wanted to included, so the two books do vary slightly, but I think they are comparably exciting overall.


I bound the books using the Skinny version of How to Make Cloth Books described by Deborah from Cloth Books for Baby. It worked OK, but I think the bulkiness of my pages made it difficult. The method is better suited to pages without so much going on around the borders.


Follow Faith and Felt Obsession on FacebookPinterest and You Tube

Which is your favourite page in these books?

Tuesday 6 September 2016

Genesis 5 - Lineage Birthday Cake Quiet Book Page

In Genesis chapter 5, we are given the lineage of Adam to Noah, along with their ages at death, and a secret message hidden in what many would consider a rather boring Bible passage.


Memory Verse: Now he called his name Noah, saying, “This one will give us rest from our work and from the toil of our hands arising from the ground which the Lord has cursed.” Genesis 5:29 NASB

Materials needed to create the Lineage Birthday Cake quiet book page:

  • A4 felt background sheet. I used mid blue.
  • felt scraps
  • sparkly felt for icing (optional)
  • sewing thread to match each colour of felt
  • magnets - I used 5mm craft neodymium magnets, but you need to be careful with these... they are very strong magnets so they are dangerous if swallowed
  • four small buttons
  • round black elastic
  • sewing machine with font function (or alternate method e.g. hand embroidery, fabric marker or transfer paper)
  • things to decorate the cake e.g. strawberries (optional).
  • the free template
Use the complete cake guide to work out where to position your cake on the page. There are two options, one with candles and one without. Since the candles sit higher than the cake, I thought I better include them so you can see how high they would sit. But since they are very close to the edge of the pattern paper, I thought it might not print properly, so I did one without as well.

Place pins as markers through each 'X'. This is where your magnets will be sewn down under the small squares of felt. Sew your magnets in position, ensuring that they are sewn down with the same side (north or south pole) facing up so that the candles all face the same way when put on the cake.


Write out your lettering using your chosen method (ensuring it will fit into that amount of space) and cut out one side of your candle set.

The name and age at death/translation side (and corresponding meaning side) should say:
  • Adam 930 (Man)
  • Seth 912 (Appointed)
  • Enosh 905 (Mortal)
  • Keenan 910 (Sorrow)
  • Mahalalel 895 (The Blessed God)
  • Jared 962 (Shall Come Down)
  • Enoch 365 (Teaching)
  • Methuselah 969 (His Death Shall Bring)
  • Lamech 777 (Despairing)
  • Noah (Comfort and Rest)
Next, cut out ten flames (not twenty) as it is easier to sew small sections onto a larger sheet of felt than sewing two small sections to each other. It makes it easier to keep things straight and lined up in the sewing machine, especially when you are also going to be inserting flames and magnets between the two parts. I found the idea for this method on the blog Laura Thoughts, so for a better explanation on how to do it, please visit here.


Sew the flames down first and cut them out. Insert them under the top ends of the candles when you pin them on to the corresponding candle side. Make sure you line up the lettering properly on the opposite side.

Start sewing the candles from the bottom end, and when you get back around (but before you get right to the end), insert a magnet into the candle and then sew it closed. You can use a wooden skewer to help push the magnet in. Again, make sure you put the magnet in with the correct pole facing down so that the name side of the candle will face outwards when placed into the cake.


Check that the lettering has been lined up and sewn correctly, then cut out your candles.

Cut out your cake sections. I doubled each of my chocolate cake sections, but the felt I was using was rather thin. if you use thicker felt you will not have to.

Cut out and sew the icing sections to the top of each cake section. Use the complete cake guide to position them on your page in line with the magnet squares and sew them onto the page by the sides and bottom, leaving the section that has the icing sewn on it free to make a pocket for the candles. Do not sew down over the icing.

Cut out your bunting from the corresponding colours as indicated on page for of the template. I wrote the English words grammar words 'IS', 'BUT' & 'AND' on the back of the blue bunting, so it can be folded over when you line up the candles and help reveal the message - although I have just discovered I placed the words in the wrong order on the bunting... oh dear! At least we can still use it on the side without the writing and insert the words in our heads.

Fold your length of elastic in half, and starting at the folded end, wrap your bunting around both strings and pin. Leave a small loop of elastic at each end and spaces where indicated so you can button it onto the page. When everything is lined up and you have worked out how much length you will need, tie the ends of the elastic together and hide the knot inside the last piece of bunting.


The bunting colours have been co-ordinated so that there is blue bunting the same colour as the candles in all the spots where an English word needs to be inserted for the grammar to make sense. There is no magnet inside the blue bunting, but sew all the rest with a magnet inside for the candle to attach to so you can reveal the hidden message by lining them up. Again, ensure that the magnet's pole is positioned so that the meaning side of the candle faces outwards when attached to the bunting. Just sew in a V shape, going over the top of the elastic so it stops the bunting moving around and the magnet can't fall out.


"but" and "the" are the wrong way around :(

Lay out the bunting on the page above the cake and mark and sew the buttons in place.

I couldn't decide if I wanted to include the strawberries, and how to attach them. I was considering hot glue or press studs, but I ended up just putting them in a small zip lock bag in the middle pocket. That way they can be played with but are not permanently attached.


Finished!

Difficulty Level = Hard

Probably the most difficult aspects of creating this page is getting the magnets into the candles and bunting while sewing. You could make them slightly wider or hand sew those sections. Also, lining up the wording is a little confusing. If you don't have a machine with an alphabet, you could use a fabric marker, iron on transfer paper, or hand embroidery instead. Using a fabric marker or transfer paper might make it less confusing as you could do the writing after the candle and bunting are sewn together.

Key Learning Areas and Skills

  • Genesis 5 - This page tells the story of the secret message hidden in the lineage of Adam to Noah
  • Imaginative Play - mmm, cake!
  • Ordering - place the name candles in the correct order of creation/birth
  • Magnets - the candles can be transferred from the cake to the bunting to reveal the hidden message
  • Tucking - the candles have to be tucked under the flap of cake to magnet on properly
  • Buttoning - the bunting elastic onto the page
  • Reading - the names, meanings, and ages
  • Decoding - find the hidden message
  • Fine Motor Skills - all quiet books encourage fine motor skill development
  • Hand-eye Co-ordination - all quiet books encourage hand-eye co-ordination

 Read the Chapter

Genesis 5

Devotional

The idea for this page came from a combination of things... and very importantly, from a poem by Emily Hunter from The Bible-Time Nursery Rhyme Book. It was a very treasured book in my childhood - a gift from my parents for my third birthday. Now that Tahlia is three, I am greatly enjoying sharing it with her too. It comes VERY HIGHLY recommended from me!

Image Source
The poem that inspired me is about Methuselah, and how he would need sooooo many candles on his birthday cake. It has a picture of a massive tiered cake with a tonne of candles on it, and I always loved that page as a child.

The other thing that inspired this page was hearing about the hidden message in the meaning of the names in this lineage. I heard it first in a sermon I think. You can find a detailed explanation here.

Basically, when you read the meaning of each name in the lineage as a list, a secret message is revealed.

Adam = Man
Seth = Appointed
Enosh = Mortal
Kenan = Sorrow
Mahalalel = The Blessed God
Jared = Shall come down
Enoch = Teaching
Methuselah = His death shall bring
Lamech = The Despairing
Noah = Comfort (or Rest)

Man (is) appointed mortal sorrow; (but) the Blessed God shall come down teaching (that) His death shall bring (the) despairing comfort/rest."


Hidden messages like this are evidence of God's design and inspiration in the Bible writings.

Methuselah has a double hidden meaning, because when he died, the flood came. It is thought that his name was intended to be a prophecy of the flood via his father Enoch. You can read more about this topic here.

Patriarchs from Adam to Israel (Jacob)
Image Source 

The ages of the people in this chapter also holds significance, something I noticed when making this quiet book page. They all lived very long lives, but since Noah wasn't yet dead, his age at death is not mentioned until later in Genesis. I think it is rather significant that his death is not recorded in this section because through the story of the flood (the first destruction of the earth) Noah represents the faithful generation that will be living at Jesus' second coming, those who will not see death in the final destruction. They will receive comfort and rest.


Follow Faith and Felt Obsession on FacebookPinterest and You Tube

Are you excited to study the "boring" Bible passages now?

Sunday 27 March 2016

Post Binding Quiet Book Closure

Normally you would put a closure on a book before you finish binding and doing your cover... But I couldn't decide whether/how I was going to do it and kept going anyway. They say necessity is the mother of invention, so here is my solution:


As I was pondering how I was going to make a closure for my finished book without making it look terrible with stitching showing all over it, I came across these display cuff-links.


They inspired this closure idea for when you have already bound your quiet book, but find that you really do need to be able to close it and don't want to waste your energy re-sewing the cover.


Materials Needed to create a Post Binding Quiet Book Closure:

  • Two large buttons
  • short piece of ribbon or elastic
  • thread
  • sewing machine with buttonhole function
  • one tiny button if using a one step buttonhole function

If using a one step buttonhole function, first do a practice buttonhole for both your small and large buttons. That way you can work out the length and center your buttonholes along the edge you want to put the closure on. Make large buttonholes along every page edge except the last, where you will make a very small buttonhole. This will ensure that the buttons and ribbon cannot fall out and get lost. 


Remember to change buttons in the measurement end of your one step buttonhole foot at the appropriate times! Also, I found that the button would often pop out of the foot when I removed each page because they were fairly thick. Watch out for that, or your buttonholes will get progressively smaller.

Instructions for how to use a one step buttonhole function can be found towards the end of my Easy Peasy Lei Flower Quiet Book Page.


Use a seam-ripper to open up the buttonholes. I sewed the buttonhole on this counting page twice since I would be cutting through a ribbon on the page.


Thread the ribbon through the button that you want showing on the top.


Then thread both ends of the ribbon through all of the buttonholes. Turn the book over and thread on the second button.


Tie a knot in the ribbon, then do a double-knotted bow so it can't come undone.


Done!


Here is Tahlia keeping herself busy barricading the kitchen while I was book binding.


Follow Faith and Felt Obsession on FacebookPinterest and You Tube

Has this solved your problem of how to add a closure after you have already bound your quiet book? Comment below!