Philippians 2 describes Jesus unselfishness and humbleness and asks us to emulate Him.

Memory Verse: “And being found in appearance as a man, He humbled Himself and became obedient to the point of death, even the death of the cross. Therefore God also has highly exalted Him and given Him the name which is above every name, that at the name of Jesus every knee should bow" Philippians 2:8-10a.
Materials needed to create the Jesus Humbles Himself and is then Exulted quiet book page:
- A4 felt background sheet - I used white
- My free template
- cotton fabric for the star-scape
- fabric glue or double sided iron-on interfacing
- felt scraps in white, yellow and brown
- very wide double sided white satin ribbon scrap as long as the cloud
- a cross or crucifix bead - I used a wooden one with the shape of Jesus cut out of it since this chapter talks about Him humbling himself and even taking on the human form but I don't really like crucifixes as Jesus is not still on the cross - indeed He died and rose again! So I feel an empty cross is better...
- A Sizzix Original and capitals lollipop alphabet/numeral die set or another method of cutting numbers about 2.5 x 3 cm in size - see my post on Letter cutting hacks. (Or you could just print them onto the felt using the sublimation/heat press method and save yourself a lot of sewing - see my post Sublimation Printing on Felt - Test).
- sewing thread to best match the page
Cut out the lettering for Jesus' name from yellow felt and the underside of the cloud out of white felt and sew the lettering to the middle of the cloud so it reads along the flat line.

 |
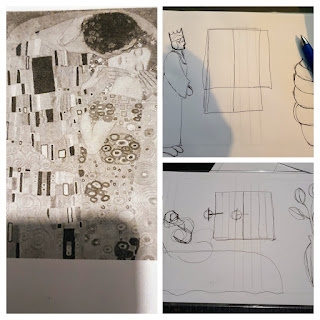
| This had been sitting mid-way through sewing for some days. I was sewing while waiting for someone to put on shoes etc before we went out. It got finished days later. Seize the moment! |
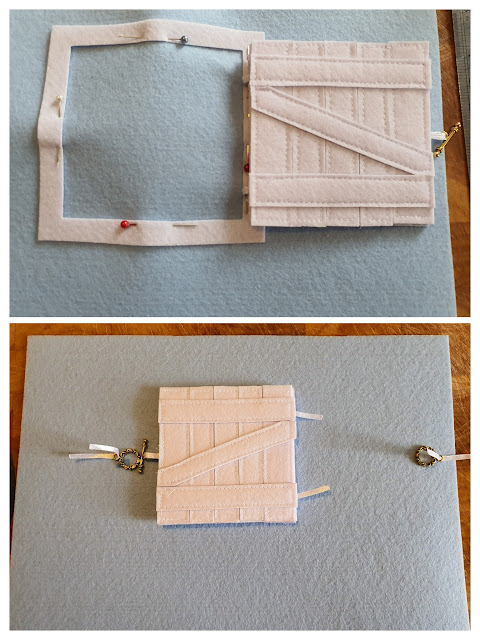
Sew the underside of the cloud with the lettering to some white felt with the white ribbon sandwiched between the layers along the flat edge, leaving enough ribbon to sandwich it underneath Heaven (and form pearly white gates) when you sew it down. Cut out the white cloud from the background making sure you fold back the ribbon as you go.


If you are using a fabric page background like I did in the above photo, you can either tuck the other side of the satin ribbon on the cloud under Heaven to form pearly gates, or under the fabric star section. So, either sew Heaven over the other half of the white satin ribbon, ensuring the ribbon goes all the way under the gates of Heaven - OR - cut out a section of starry fabric and use fabric glue or double sided iron-on interfacing to attach it to your page with the other side of the satin ribbon cloud hinge inserted un derneath. Once dry or ironed, use a narrow zig zag stitch to outline the edge and prevent the star fabric from peeling or fraying.
The cloud should flip down to reveal Heaven where Jesus humbled Himself to come down from, and flip up to reveal Jesus name being exulted.

Sew down your brown felt hill and attach your cross/crucifix bead so it stands on the hill but isn't covered when the cloud is flipped downwards (like mine was a little).
 |
| Cross choices |
Finished!
Difficulty Level = Intermediate.
Small corners can be tedious to sew, but this page is so worth it!!
Key Learning Areas and Skills
- Philippians 2 - Jesus humbled Himself and therefore God glorified Him - every knee will bow at the name of Jesus
- Peek-a-boo - open the cloud to reveal the name of Jesus
- Imaginative Play - bend the knuckles on your index and middle fingers to emulate kneeling at the name of Jesus
- Fine Motor Skills - all quiet books encourage fine motor skill development
- Hand-eye Co-ordination - all quiet books encourage hand-eye co-ordination

Read the Chapter
Phillippians 2Devotional
Jesus was not so high and mighty to consider Himself above coming to Earth in the body of a human and submitting to death on a cross. As I have mentioned before, imagine a King who is unwilling to lead the army into battle, or who keeps his own son at home so he doesn't die in a battle. What kind of example to his people would that be. What kind of confidence does that instil?
Orphan No More Co - Easter Morning (Live)
Jesus showed us how to live. Self sacrifice and humility is the way to go. Because Jesus humbled Himself, God exulted His name above all names, that at the sound of His name, every knee will bow. And if we humble ourselves, God will make us shine like the stars.

We can be confident in humility and submitting to God's will - Jesus is our demonstration of the results. We will not stay in reduced circumstances forever. In a little while, God will give us new bodies, and give us a place in Heaven. In the meantime, lets bow the knee.

Which version of this page do you prefer? Comment below!