Showing posts with label Book of Psalms. Show all posts

Thursday 24 November 2022

Alpha (Old Testament) Quiet Book - by Steph

This is the first in a series of two quiet book made by my friend Steph. 


I really loved her idea of using an Alpha symbol over the cross for the Old Testament and an Omega over a cross for the New Testament covers.


Although the books are not quite finished (and I think a lot of quiet books fall into this category), I am going to share the pages that are already done for now. Steph knew she would never get around to making a sewn book, so she opted for glue. This has enabled her to use both the front and the back of a piece of felt for activities, which is not only cheaper, but means she doesn't have to sew the pages back-to-back either. The books are bound using ribbon strung through some holes made with a hole punch. So simple!


Page one is for creation. Steph really wanted to highlight to her children the creation of spaces in the first three days, and the filling of those spaces in the following three days:

Creation KingdomsCreature Kings
Day 1 - Light
(Day/Night)
Day 4 - Luminaries
(Greater light to rule the day and
the lesser light to rule the night)
Day 2 - Sky/WaterDay 5 - Birds/Fish
Day 3 - Land/VegetationDay 6 - Land animals/Man
The Creator King
Day 7 - Sabbath


This view of Genesis 1 is called the Framework Interpretation, and although many of it's proponents hold to a symbolic meaning to the days of creation, there is no reason that it cannot and does not apply to a literal view just as readily (as Steph and I do).


Page two is one of the creatures God created - a crab. It was bought from AliExpress, so was a very easy make.


Page three is an apple tree (also bought from AliExpress) for the Tree of Knowledge of Good and Evil story in the Garden of Eden.


Page four is a Noah's ark matching game inspired by the Betty Lukens kit I used in my Genesis 8 - In The Ark Quiet Book Page.


Page five is some corn weaving for the story of Joseph (bought from AliExpress). (Sorry Steph but I think the corn is referring to kernels of wheat rather than corn as we call it today)!


Page six is for the 10 Commandments - you can list a Commandment as the frog jumps on each lily pad. Sorry again Steph, but this is my least favourite page in this book because frogs are actually associated with unclean/evil things (think Revelation) so I'm not a fan of using them to illustrate God's Holy Law, despite how cute they might be!


Page seven is a sandal to tie and untie (bought from AliExpress) for the Children of Israel wandering in the wilderness, and we can remember how God made their sandals last the journey (Deuteronomy 29:5).


Page eight represents how God can wash us so we will be whiter than snow (Psalm 51).


On page nine you can dress up Queen Esther in various outfits, with one basic dress for before she became queen, and three more decorative ones for afterwards. Esther means "hidden" and you can hide her Jewish identity (the Star of David) like her Uncle Mordechai asked her to with her dresses. I love all the little details, so well done on this one Steph!


Page ten is David's harp (drawn free-hand - great job Steph)!


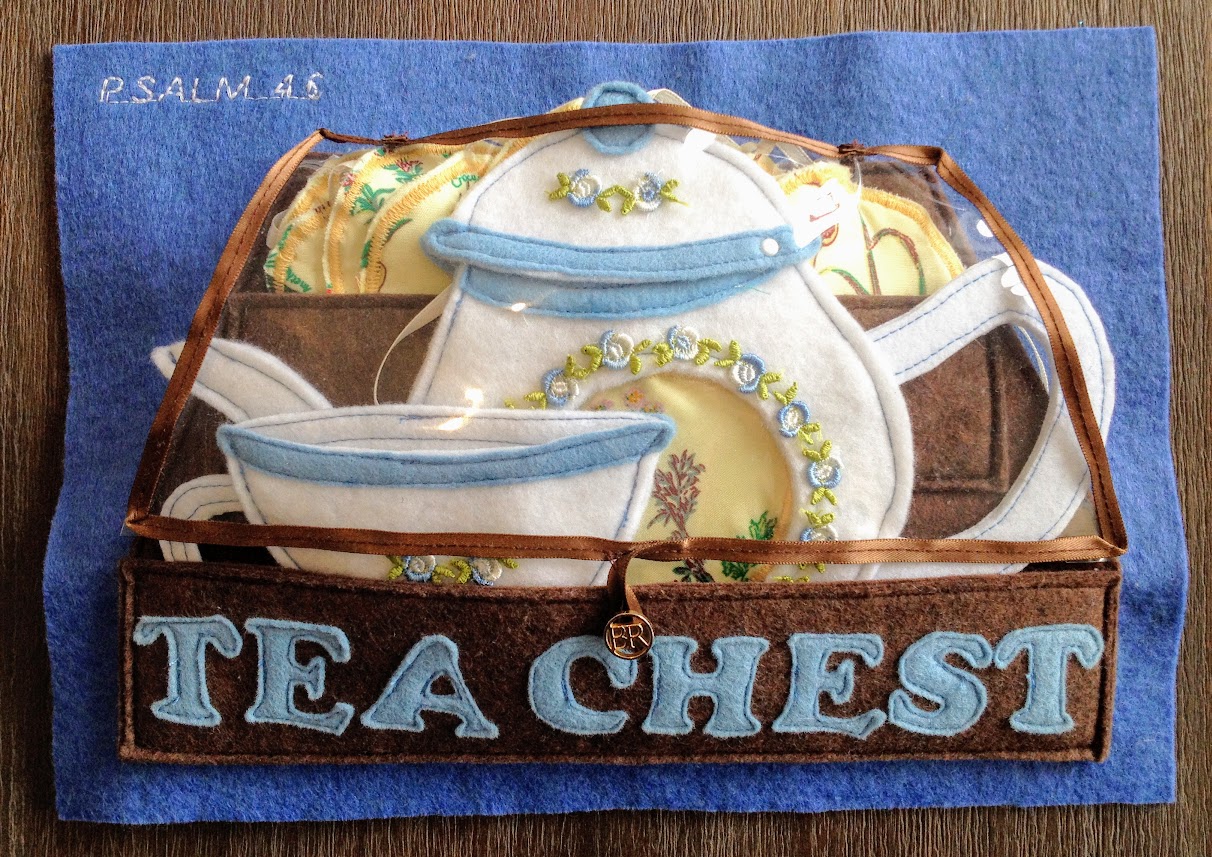
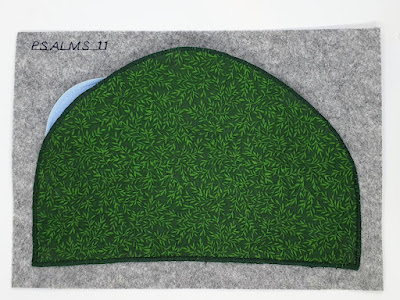
Page eleven is a mini felt Bible hidden in a heart pocket - for Psalm 119. We need to treasure God's word and learn it off by heart so we have it with us always.


This is my absolute favourite page, and it deserves it's own post, so I will be reserving photos of inside the Bible for that - sorry, not sorry hahaha.


Page twelve shows three different aspects of David's life - King, Shepheard, and how he was a man after God's own heart. You can trace the shape of the pipe cleaners from David on the left to the symbols on the right.


Page thirteen is a hand and numbers for counting. It was originally intended to be for the 10 Commandments, but two hands didn't fit on the page. Instead it could link to a few things, such as God knowing everything about us, and counting the blessings God has given us. 


A bit of trivia for you - there is no Bible verse which talks about counting your blessings. I only know because I looked when trying to match another one of my quiet book ideas to a Bible chapter... Oh well!


The hand was free cut and Steph added Velcro dots bought from office works. Most things in the book were free cut and she didn't draw at all (cause she says she is really lazy).


Page fourteen is a wooden puzzle in the shape of a precious stone. After all, wisdom is better than rubies (Proverbs 8:11). It was bought from a dollar store. Steph has written some words of wisdom on it and made a pocket out of felt in the same shape as the puzzle. 


Page fifteen is my second favourite in this book so far. Steph says the idea was "totally stolen" from an idea I had told her about for a future page. Although mine is for a different verse and will look quite different, I might just have to steal this idea right back for the verse Steph is applying it to! This page goes with Ezekiel 11:19, "I will give them an undivided heart and put a new spirit in them; I will remove from them their heart of stone and give them a heart of flesh." (NIV). The heart is removable.


Page sixteen is a season tree. Whilst there is no activity, it is a rather tactile page. This page is for Ecclesiastes 3 - there is a season for everything. 


Psalms 1 also talks about a tree planted by the waters which brings forth fruit in due season.

Page seventeen is Jonah and the whale.


There are an odd number of pages because this project is still growing.


Follow Faith and Felt Obsession on FacebookPinterest and You Tube

Which page did you enjoy most in the Alpha (Old Testament) Quiet Book? That is a bit of a cheeky question, since I didn't share my favourite page here properly!

Thursday 3 November 2022

Psalm 11 - Flee as a Bird Thaumatrope Quiet Book Page

Psalm 11 asks why we should flee as birds to a mountain when we are trusting God for protection.


Memory Verse: “I trust in the Lord for protection.
So why do you say to me,
“Fly like a bird to the mountains for safety!" Psalm 11:1.

Materials needed to create the Flee as a Bird Thaumatrope quiet book page:

  • A4 felt background sheet - I used dapple grey
  • My free Psalm 11 - Flee as a Bird Thaumatrope Quiet Book Page Template Pattern
  • cotton fabric for the green mountain
  • fabric glue or double sided iron-on interfacing
  • felt scraps in green, sky blue, orange and dapple grey
  • decorative beads in orange and silver
  • short dowel rod (about 20cm in length, 7mm in diameter)
  • hot glue and glue gun
  • sewing thread to best match the page
  • scissors!
Mark and cut out the mountain shape from your mountain fabric and use fabric glue to glue it to a piece of green felt (or use thedouble-sided iron-on interfacing according to the directions). Once it is dry, cut it out and sew a fine zigzag stitch along all edges to stop it fraying and peeling. Then sew it onto your background felt to about just below half way up the sides of the mountain leaving the top open to form a pocket.


Cut out the circles from the sky blue felt and sew down your orange birds followed by their dapple grey wings, making sure to position one in the upper position and the other in the lower position. Hand sew on your decorative beads.


Testing different decorative bead positions


Position your circles back to back (ensure the birds are level with each other) and sew around the circles, leaving about a 2cm hole at the bottom. Use hot glue on about 4cm of the end of your dowel rod and insert it into the hole and press the birds together to attach it. 

Spin the thaumatrope rod between your hands to watch the bird fly away to the mountain.

Finished!

Difficulty Level = Easy, plus No Sew version.

A very easy quiet book page!
Just use hot glue wherever sewing is recommended for a no sew version.


Key Learning Areas and Skills

  • Psalm 11 - Putting your trust in God is the best way to stay safe and remain calm when you are in danger.
  • Imaginative Play - Fly your birdie to safety in the mountains.
  • Fine Motor Skills - all quiet books encourage fine motor skills through turning pages, and on this page, through using the thaumatrope.


Read the Chapter

Psalm 11

Devotional

This Christian Hymn seems to be to be using the phrase "flee like a bird to your mountain" in the opposite way to what David's adviser was. But the point in the end is the same. God is your refuge, put your faith in Him.

I have heard stories of many people who chose to stay in dangerous places because they felt that is where God wanted them. They trusted Him and escaped all kinds of danger because He looked after them. The most dangerous place in all appearances may actually be the safest because God is with you. The safe places might actually be the most dangerous because you are no longer relying on God.


I looked up some of the birds that inhabit Israel and tried to model mine on the Oriental Turtle-dove and the Laughing Dove.


Oriental Turtle Dove : (Streptopelia orientalis) in Satara
I, Ravivaidya - CC BY 2.5


Laughing dove (Spilopelia senegalensis cambayensis)
at Zighy Bay in the Musandam Peninsula, Oman
Charles J. Sharp - CC BY-SA 3.0


Follow Faith and Felt Obsession on FacebookPinterest and You Tube

Have you made a thaumatrope before? Comment below!

Thursday 26 March 2020

Psalm 28 - Shepherd Them Quiet Book Page

Psalm 28 was written by David and praises God who rescues him when he puts his trust in the LORD.


Memory Verse: “Save Your people,
And bless Your inheritance;
Shepherd them also,
And bear them up forever.” Psalm 28:9 NKJV. 

Materials needed to create the Shepherd Them quiet book page:

  • A4 felt background sheet - I used tan
  • Betty Lukens Felt book 01 Bible Stories available at Koorong
  • sewing thread to best match the page
  • scissors!
Cut out all the pieces for this page and the page itself from the Betty Lukens set. The Betty Lukens FAQ section has posted a cutting tips PDF.

Sew the Betty Lukens page onto the background felt along three sides, leaving the top edge open to form a pocket. Pop the pieces inside the pocket (or better yet - play with them)!

Finished!


Difficulty Level = Easy, plus No Sew version.

A very easy quiet book page!
Just use hot glue wherever sewing is recommended for a no sew version.

Key Learning Areas and Skills

  • Psalm 28 - Praise God that He is willing and able to hear our prayers, save and shepherd us
  • Imaginative Play - make the lambs play and eat the grass, play the harp with David
  • Fine Motor Skills - all quiet books encourage fine motor skill development
  • Hand-eye Co-ordination - all quiet books encourage hand-eye co-ordination


Read the Chapter

Psalm 28

Devotional

We all know that we don't deserve to have the Master of the universe listen to our beck and call. And yet this Psalm is all about praising Him because He hears us.

The sole reason given in this Psalm that God answers our prayers is that we trust Him. He loves to come through for us because of that.


Psalm 28:1-2,6-9 Song
"To You, I Will Cry, O LORD"
(Esther Mui) Christian Praise Worship Lyrics


Follow Faith and Felt Obsession on FacebookPinterest and You Tube

Have you asked God to be your shepherd - will you trust Him to lead you?

Thursday 27 February 2020

Psalm 29 - Enthroned Above The Flood Quiet Book Page

Psalm 29 reassures us the God is both powerful and in control. He sits enthroned above the flood.


Memory Verse: “The Lord sits enthroned over the flood; the Lord is enthroned as King forever." Psalm 29:10 NIV


Materials needed to create the Enthroned Above The Flood quiet book page:

  • A4 felt background sheet - I used blue
  • a Noah's ark and animals image - I used this printable from the article Sharing Time: The Prophet Will Tell Us in the LDS kids magazine Friend
  • felt in white, green, red and as close as you can get to gold
  • Kam snaps
  • ric rak
  • 30cm of 2mm round elastic
  • wooden cloud buttons - I bought these from AliExpress (not an affiliate link)
  • dotted mesh material
  • 40mm wide rainbow ribbon - I bought this from AliExpress (not an affiliate link)
  • gold pleather
  • clear craft glue if using pleather to make sewing easier - I used polyacetic acid & ethylene resin based glue
  • decorative beads
  • a throne template - I modified this Colouring page Saint Nicholas' throne from edupics.com
  • hot glue gun and glue

Firstly, get the Noah's Ark and animals transferred onto white felt by the sublimation printing and heat press method - see my post on Sublimation Printing on Felt - Test. Cut out the ark and animals and sew the ark onto the background page along three sides leaving the top open to form a pocket for the animals.

Prepare two wooden cloud buttons by threading 15cm of the elastic onto each and tying a knot to create a loop of elastic. Slide the knot to the back of the button and hot glue in place. Cut the ends short.


Cut your mesh material to size to fit inside your page with extra length (and width if you want to finish the edges first - I didn't but I wish I had). Fold the top over itself a couple of times and pin and sew along the top edge as shown above, placing the elastic of the buttons underneath at either end. Make sure the end is poking out the bottom so you can pull it up and over the buttons to hold the rolled up mesh in place later.


Measure your ground and make a few layers of grass for the animals to sit in. I used ric rak to edge the top of the grass as there would be too many layers of felt along the bottom if I doubled the felt as I usually do. Use kam snaps to attach the grass to the page. At the back, use small squares of spare felt to strengthen them and prevent them ripping a hole when being pulled.


Cut a length of rainbow ribbon to fit your page and melt the edges - see my post on How to Stop Ribbons Fraying. I rounded the edges, but you don't have to. Mark where the button holes should be on the ribbon, then sew and cut.


Use the a colouring page as a throne template to make your throne. Simplify the lines by joining some together and rounding off the top.


Before sewing the pleather, I used the glue to attach the pleather to a sheet of felt. My pleather was stretchy which makes it very difficult to sew. Allow the glue to dry before sewing in place. Then sew the red felt on top and cut out the front section of the throne. Decorate with beads at the top.


Make a slot for threading the throne onto the rainbow ribbon by doubling a piece of felt and sewing onto the other half of your sheet of felt. Make sure it is slightly wider than your rainbow ribbon to allow it to pass through easily. Hot glue the throne to the sheet of felt with the slot facing out and centered at the back. Cut out the throne once again.

Thread the throne onto the ribbon and button it on, or store in the ark pocket.

Complete!


Difficulty Level = Intermediate.

Pleather can be difficult to work with.


Key Learning Areas and Skills

  • Psalm 29 - God is in control even when it might seem like He is not
  • Rolling - roll up the rain, and roll it down again
  • Buttoning - secure the rain when it is rolled up with the elastic and cloud buttons, button on the rainbow ribbon
  • Threading - thread the throne onto the rainbow ribbon
  • Colours - learn the colours of the rainbow
  • Tucking - tuck the animals into the ark
  • Using snaps - snap on and off the ground to make it appear to flood
  • Fine Motor Skills - all quiet books encourage fine motor skill development
  • Hand-eye Co-ordination - all quiet books encourage hand-eye co-ordination


Read the Chapter

Psalm 29.


Devotional

Maybe you feel like everything is out of control, but God assures us that He's got it. Sometimes trouble is what we need to wake us up and turn our course. When trial comes are we willing to listen to instructions and build an ark? Or do we insist on our own way?

This Psalm speaks about God twisting the oaks and breaking the cedars. Trees are often used as a symbol of men and strength. So the strength of men is nothing to God. Therefore, why worry about what man can do to you? Rather worry about pleasing God.

Not only does God rule over the kaos of The Flood, but He caused it.


Psalm 29 - HeartSong


Follow Faith and Felt Obsession on FacebookPinterest and You Tube
Have you made a Noah's Ark quiet book page? I'd love to hear about it in the comments!

Tuesday 27 November 2018

Psalm 122 - Pray for the Peace of Jerusalem Quiet Book Page

Psalm 122 instructs us to pray for the peace of Jerusalem.

Memory Verse: "Pray for the peace of Jerusalem:
“May those who love you be secure." Psalm 122:6 

Materials needed to create Abraham's Journey quiet book page:

  • A4 felt background sheet. I used tie dye felt. Peace man!
  • a second tie dye felt sheet or black soft felt
  • black stiffened felt
  • sticky/packing tape
  • sewing thread to match
  • black velcro dots
  • hot glue gun and glue
  • my free template (puzzle pieces only)
  • peace sign template available from Wee Folk Art
First cut your template pieces out and tape them onto your black stiffened felt. This is so that you don't puncture the felt with pins and so you can see where to cut as it is difficult to draw on felt in that much detail.


The next step depends on whether you have a second piece of tie dye felt or not (I didn't). If you do, you can eliminate some of the following - I'm sure you can work out which bits ;)


I sewed my peace sign down onto the middle of my tie dye sheet by the inside sections only. Do not sew the outside circle yet. This enabled me to cut out the peace sign and fill in the background space with black soft felt. I also sewed the peace sign to black soft felt around the outside edge and cut it out again. Now simply sew your peace sign back over the hole you cut it out from around the bottom half leaving the top half open to form a pocket.


Cut your velcro dots in half and hot glue the soft side to the outside rim of the peace sign in the middle of each quarter. Glue the scratchy half to each puzzle piece.

Finished!


Difficulty Level = Intermediate

It will be easier if you have two sheets of the tie dye felt rather than trying to use one. I only had one and had no way of getting more.

The hardest part is getting motivation to cut out the menorah!

Be careful to glue the velcro dots on the correct side - unlike me who had to try to pull one off and re-glue it...


Key Learning Areas and Skills

  • Psalm 122 - This page teaches about the map of the Old City of Jerusalem in modern times and about how we are all connected to each other - when we harm others we harm ourselves
  • Puzzle Pieces - connect the puzzle pieces together
  • Fine Motor Skills - all quiet books encourage fine motor skill development
  • Hand-eye Co-ordination - all quiet books encourage hand-eye co-ordination


Read the Chapter

Psalm 122


Devotional

For a city with a name which means "peaceful", Jerusalem sure doesn't see a lot of it.

This quiet book page is largely a play on words - pray for the peace / pieces of Jerusalem.

Nowadays, the old city of Jerusalem is quite literally divided into four quarters.


Image Source - Encyclopaedia Brittanica


Neverlesless, we are all connected to each other, and when we harm others, we harm ourselves. It is for his own family's sake that the Psalmist wishes for peace.

I imagine Jerusalem will never achieve peace before the Second Coming, nevertheless it does need our prayers. But perhaps this verse is asking us to pray for the Kingdom. Perhaps we are asked to pray that the peace of Jerusalem to come will be present in our lives regardless of our circumstances. May the Prince of Peace bring comfort, hope and joy to your soul as He has done for so many others already. I pray this peace for you.


Paul Wilbur - Shalom Jerusalem


Follow Faith and Felt Obsession on FacebookPinterest and You Tube

Hearing from you gives me great encouragement!

Friday 12 January 2018

Psalm 46 - Be Still and Know that I Am God Tea Set Quiet Book Page

Psalm 46 tells us to "be still and know that I am God".


Memory Verse: "Be still, and know that I am God; I will be exalted among the nations, I will be exalted in the earth!" Psalm 46:10.

Materials needed to create a Be Still and Know that I Am God Tea Set quiet book page:

  • A4 felt background sheet. I used mid blue.
  • about 4 sheets of brown felt
  • thin brown and cream ribbons
  • clear vinyl/plastic scraps
  • small button - I used one with a shank (loop at the back)
  • printed herb material
  • wadding / batting scraps - ask your quilting friends
  • white felt
  • stiffened white felt (for the teapot and tea cup handles)
  • light blue felt scraps
  • light blue ribbon to match the light blue felt (optional but easier)
  • light blue embroidered flowers etc to decorate
  • sewing thread to match/contrast
  • hot glue gun and glue
  • printer to print the templates and the words "tea chest" in a nice font to use as a template - I used Cooper Black in size 120.
  • I used the following colouring sheets as templates for the teapot and teacup - they may need shrinking to a size you are happy with. I think I printed the teacup to fit about four on an A4 page.
  • a cup or glass to use as a tea bag and teapot cutout template. Check that it fits inside the teapot and tea chest pocket when you print it out.
  • my free tea chest template (minus lettering)

Tea Chest: First cut out some lettering that will fit on your front tea chest pocket. Sew it onto the front single layered pocket piece. Next, cut out the base of the tea chest and sew it down onto the same coloured felt to double and strengthen it. Do the same with both pocket pieces. Cut them all out and sew the doubled pocket pieces in position on the base.


Cut out the lid from your vinyl and edge it with the brown ribbon. Start a little off the midpoint of the bottom edge and end back at the midpoint, overlapping your starting point. Form a loop at the end by folding the ribbon back under itself before finishing. Stop sewing before you get to the end of the ribbon to leave a loop of ribbon. You will use this ribbon loop to hook over the button and close the lid. Re-enforce the stitching here several times as mine is already starting to pull off.

To enable easier movement of the vinyl through your sewing machine, you can do several things. I wedged a piece of paper between the sections of my sewing machine so it would slide properly and not stick to the plastic on my machine. You can use scotch / frosted sticky tape on the bottom of your sewing machine foot for the same reason, but I found I didn't need to as I was sewing on top of the ribbon.


If you want to store your tea pot in the tea chest like I did here, you may need to make some hinges. This allows for a gap at the top which you may need if your teapot is too tall like mine was. I have made two versions of this tea set - one for the Quiet Book Bible Project, and one for my niece. Since I want everything to fit on one page for the Bible Quiet Book Project, I needed to store the teapot and cup in the tea chest - one of the reasons there is only one cup featured here. (Also, the Bible verse is rather conducive to one cup - it can be hard to be still at a tea party)! The version I made for my niece didn't require everything to fit on one page so she has a double page spread. My sister made her a storage pocket to keep her teapot and cups in.


Create two ribbon hinges for the lid by cutting two small strips about 8cm long and melting the edges with a match to prevent fraying. Fold them in half and sew them to the top of your lid. I put my machine on zig zag stitch with a stitch length of zero to go backwards and forwards over the same spot. I did this twice in an 'x' shape on the top of the folded ribbon hinges.

I used a ruler to make sure the angle was 45 degrees.

Pin the other end of the ribbon hinges underneath the top edge of the base and sew the base down around all sides except the right or left slanted side. That will create a secret pocket to store extra tea bags in if needed.

If you are not using hinges, sew the base down to the page leaving the same gap on one of the slanted sides to form a secret pocket. Then sew down the lid on top of the base along the top edge only.

You should be able to fold this little corner back so you can sew the tea chest
onto the page without sewing over the top of the upper pocket.

Sew your button to the middle of the front pocket that says "tea chest" and use the ribbon loop to close the lid.


Tea Bags: Use your cup or glass to mark circles over the printed herbs on your material. Cut them out in a square shape leaving plenty of room around your circles.  Then cut another square the same size from each of the herbs as well.

Sandwich a piece of wadding or batting between the two squares of material, right sides facing out. One of the squares should have a circle traced around one of the herbs. The other side should be the same herb but without a circle traced around it.

Cut as many 20cm lengths of ribbon as tea bags you are making. I made twenty tea bags because that is how many different printed herbs there were on my material. Melt the ends using a match to prevent fraying.

Pin the sandwiched tea bags together around the circle. Slip both ends of a length of ribbon between the wadding and the side with the circle traced on it and pin it in place. This will form a ribbon loop for your tea bag. Set your sewing machine to zig zag and a stitch width of just under 1 (like you would when sewing a buttonhole). Sew around the circle shape. Cut out your tea bags ensuring you do not cut off the ribbon loop whilst doing it.


Tea Pot: Cut out your teapot template from the colouring page. You will need to print it out several times and cut out the teapot handle with extensions at the ends to allow it to be sewn in place between two layers of felt. Also, cut the teapot bodies a slightly smaller width and slightly taller at the top to allow it to fit underneath the lid so it can close properly.

Cut your handle from white stiffened felt. Cut two teapot bodies and two teapot lids from white felt. If your child is right handed, draw around the cup or glass on the inside of the front teapot body. Cut out the hole. Lay a piece of clear vinyl over the space and sew around the circle to form a window into the teapot. That way you can see which type of tea you are pouring each time. Trim the excess.

There are tips for sewing with vinyl listed above in the tea chest section.

I purposely used a thread in the contrast colour so I would not have to keep swapping colours on my machine so frequently.

Cut out your strips of ribbon and contrast felt sections (the knob at the top of the tea pot and the edges of the teapot and tea cups). If you are using felt you will have to print out a couple of copies of the templates and eyeball some of those sections from that. If using ribbon (recommended to reduce the thickness when sewing it together), melt the ends with a match to prevent fraying. Sew all sections in place. If using ribbon, only sew along the bottom edge of the ribbon at the edge of the teapot body where you will be joining on the lid. This will enable you to fold back the ribbon and allow you to put a split pin through without damaging the ribbon.

Pin the teapot bodies together and sandwich the handle in between the two layers. I chose not to sew the spout closed. Pin the lid together too. Sew both together. You may need to use the hand knob on your machine to get through the thickness of the stiffened felt when sewing through the handle.

Use a darning needle to make holes for the split pins and insert them. I used one on each side.


Hot glue your embroidered flower embellishments in place.

Tea Cup/s: Cut your template from the colouring page in a similar manner to the teapot. Cut your handle/s from white stiffened felt.

Cut out your strips of ribbon or contrast felt sections. If using ribbon (recommended to reduce the thickness when sewing it together), melt the ends with a match to prevent fraying.  Sew in place.

Pin the tea cup/s together and sandwich the handle/s in between the two layers. If you are only making one tea cup, remember to put the handle on the opposite side to the teapot so you can hold one in each hand and still see the pretty decorations. I put both mine on the same side and had to undo it later and swap the handle to the other side on my tea cup to please Tahlia. She wasn't happy she couldn't see the decorations on the tea cup while pouring her cup of tea. I did four tea cups for my niece, so I did two of each side for her.

Sew the tea cup together. You may need to use the hand knob on your machine to get through the thickness of the stiffened felt when sewing through the handle.

Hot glue your embroidered flower embellishments in place.

Finished!

Difficulty Level = Difficult.

I have suggested a few changes to make it a little easier. I wish I had thought of them earlier!

Key Learning Areas and Skills

  • Psalm 46 - Learn to be still and trust God to help us through our problems
  • Imaginative Play - Practice relaxing, "let go and let God" while talking things over with Him over a cup of tea
  • Herbal Medicine - Get informed about what each herb looks like, which parts to use, and what properties they have
  • Fine Motor Skills - all quiet books encourage fine motor skill development
  • Hand-eye Co-ordination - all quiet books encourage hand-eye co-ordination


Read the Chapter

Psalm 46

Devotional


Though the tempest rages around us, we can sit and confidently enjoy a cup of tea knowing that God is in control. We may be overwhelmed by the things we experience, but to God all our trials are like a storm in a tea cup. He can sort our problems and give us calm in the midst of the storm. Take a moment today to talk over your problems with Him over a cuppa. It will be time well spent.


Follow Faith and Felt Obsession on FacebookPinterest and You Tube

Do you find yourself praying while you sip on a cuppa?