Monday, 24 September 2018

Genesis 50 - Joseph's Bones Quiet Book Page

Genesis 50 contains Joseph's dying words where he expresses his faith that God will make good on His promise to bring Israel out of Egypt. Joseph  asks his descendants to bring his bones with them when they leave.


Memory Verse: "So Joseph made the Israelites swear, saying, “When God comes to you, you shall carry up my bones from here.” Genesis 50:25.

Materials needed to create the Joseph's Bones quiet book page:

  • A4 felt background sheet - I used aqua
  • gold coloured material that won't fray - I used pleather but it was difficult to sew due to it's stretchiness (made easier by gluing first)
  • clear craft glue if using pleather to make sewing easier - I used polyacetic acid & ethylene resin based glue
  • gold trim
  • gold ribbon - melt the ends to prevent fraying
  • sewing thread to best match the colours
  • two buttons - I found some ivory ones with black etchings that somewhat resembled hieroglyphics
  • felt in gold/straw (or near enough), black, skin colour, and white/glow-in-the-dark
  • glow-in-the-dark paint if using white felt
  • decorative material or ribbons etc for the coffins
  • white ribbon for wrapping Joseph's mummy
  • my free template
Trace the sarcophagus, coffin head and death mask pieces using the template onto the back of your pleather using pen - this will avoid puncturing the pleather unnecessarily. Cut them out. Glue the front and lid of the sarcophagus to your gold/straw felt, inserting small strips of ribbon to form hinges along the top edge of the lid and loops for your buttons along the bottom edge. Make sure you make big enough loops to fit the buttons through easily. You can use pins to keep the ribbons in place if you need to but make sure it is where you will be sewing so you don't have holes where they will be visible. Leave to dry overnight.


Sew the pleather to the felt on all sides for the lid, reinforcing where the ribbons are. Only sew the top edge for the front. Cut them out ensuring you do not cut off the ribbons. Next glue the sarcophagus back to the background page, inserting the other ends of the ribbon hinges from the lid. Sew down once dried overnight. Then sew the front on the bottom and sides to form a pocket. To complete the sarcophagus, hand sew your buttons on.


Cut scraps of pleather to fit underneath the face holes of the coffin heads and death masks. Glue the death mask pieces to the gold/straw felt, layering a scrap in position under the front piece with the face hole. Leave to dry overnight, then sew down around the face hole and edges. Cut out the pieces and sew together along the top curve.


Decorate your coffin bases as desired and glue and sew on the head pieces. Sew together by the sides excluding the head or from the center of the head at the top to the center of the base at the bottom to form pockets.


I sewed the black one the first way as there was no reinforcing on the base and the other way for the blue/green coffin as it had a double layer due to the material.


I also used glue under the decorative material on this one as it is very thin material and very prone to fraying. To ensure there would be no fraying I did a tight zig zag stitch around those edges too.


For the mummy I doubled the skin coloured felt twice, inserting a wide white ribbon between the under body piece before sewing the two doubled pieces on top of each other along one straight side edge.


To make the bones I drew around the template pieces onto my white felt with a black pen and painted the glow in the dark paint on.


Glow-in-the-dark felt would make this step easier - not that it was hard, but as it is unavailable in Australia and I could not find a seller online, this was my solution. To finish, simply cut out the bones and glue them in place on the inside of the body.

Done!


Difficulty Level = Intermediate.

If you are using pleather the glue is imperative. It will be a nightmare without it as you will get bunching and/or stretching out of shape. Also, DO NOT attempt to use tape instead of glue - you will end up with the dodgy sewing featured below and have to start over.


Key Learning Areas and Skills

  • Genesis 50 - Joseph showed his faith by instructing his descendants to take his bones with them when God brought them out of Egypt!
  • Imaginative Play - wrapping and burying an Egyptian mummy is pretty fun, not to mention golw-in-the-dark bones!
  • Buttoning - open and close the sarcophagus lid
  • Wrapping - wrap the ribbon around the body
  • Sequencing & Spatial Awareness - order the pockets the wrapped body goes into - death mask, small coffin, large coffin, sarcophagus
  • Science - could incorporate a lesson about UV light and glow in the dark phenomena
  • Fine Motor Skills - all quiet books encourage fine motor skill development
  • Hand-eye Co-ordination - all quiet books encourage hand-eye co-ordination


Read the Chapter

Genesis 50


Follow Faith and Felt Obsession on FacebookPinterest and You Tube
If you know of any earlier patterns or other information, I'd love to hear from you!


Devotional

There are Jewish legends about Joseph's bones that tell stories about the Israelites forgetting to take them with them when they were about to leave Egypt. The stories were written well after the fact and there are variations in the details, but basically the story goes that the pillar of cloud/fire would not move when they were all assembled ready to leave. The great-granddaughter of Levi realised that they had forgotten Joseph's bones. She was the only person old enough to remember where his body was laid. Apparently the Egyptians had sunk his coffin into the Nile River in an attempt to bless it, so Moses had to perform a miracle to get it to float so it could be retrieved. Only then did the pillar move forward to lead them out of Egypt.

Whether the story has some truth to it I don't know, but I did find it rather interesting.


You can see the monument at Joseph's burial site in this video.


Our actions follow from what we believe to be true. Joseph gave instructions about his bones fully believing that God would bring the Israelites out of Egypt. God had told Abraham that his descendants would be enslaved in Egypt for four hundred years (Genesis 15). He also brought them to Egypt to keep them safe throughout famine. That which brought blessing also brought suffering. And you can see in what Joseph says on his deathbed that he believed both that Israel would suffer in Egypt even though throughout his lifetime it had been a blessing and that God would come to their aid and bring them out of Egypt. Indeed they did need God to come to their aid to secure release from Egyptian slavery. The story of Exodus shows what great lengths God went to keep His promise. He will surely keep the remainder of His promises and bring us out of this world of suffering and into His eternal life of blessing. May our actions demonstrate our faith to our children and peers like Joseph's did.


Follow Faith and Felt Obsession on FacebookPinterest and You Tube

Which is your favourite coffin?

Saturday, 1 September 2018

The Evolution of Quiet Books

While it may at first appear that there is not a lot of readily available information about the history and development of quiet books, I have been able to find some quite interesting details regarding their evolution.

Firstly I would like to draw your attention to a very informative article The History of the Bendable, Durable, Chewable Board Book by Olivia Campbell on the LIT HUB website. She talks about the results of technology development and the financial access it brought to books and toys as well as a dramatic paradigm shift that occurred in relation to children and books in general. It is an interesting read.


Image Source


In 1902, Dean's Rag Books Company was formed, publishing the first printed cloth books. They had pinking sheared edges and were advertised as being indestructible. Unlike paper books, the pages could not be torn and/or eaten by children and they could be washed, sterilized, and slept with comfortably. The company went on to produce printed panels which could be sewn into a book by the purchaser. They extended this idea to their traditional book range and made cut out model books out of card which buyers could put together themselves. See The Brighton Toy and Model Index for more details on Dean's Rag Books Company or the book on it's history pictured above.

Dean's Rag Book Company was an offshoot of the Dean & Son book publishing company founded not long before 1800. The University Libraries website credits them with publishing the first movable books, including pop-up books, pull-tab books, and pantomime toy books. Dean's Rag Books Company does not seem to have incorporated these ideas into their cloth books.


Image Source


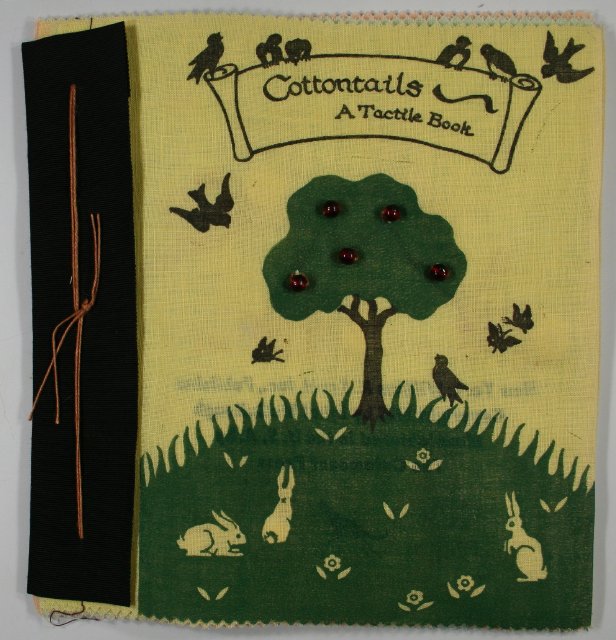
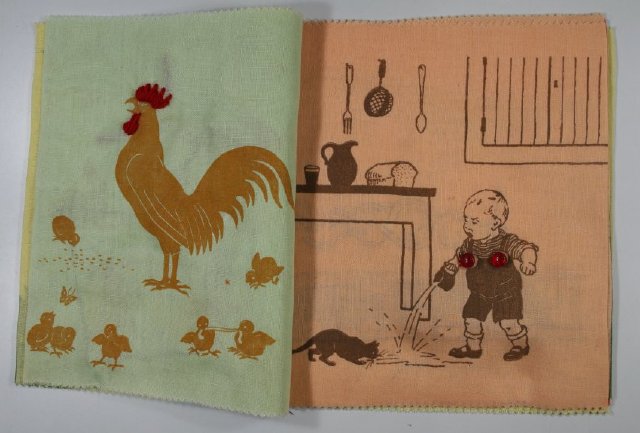
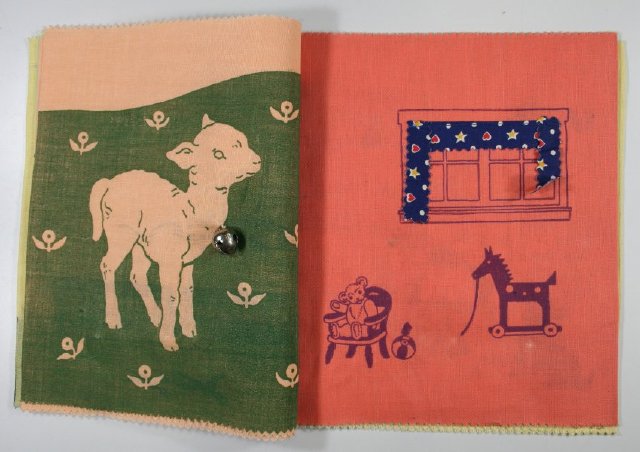
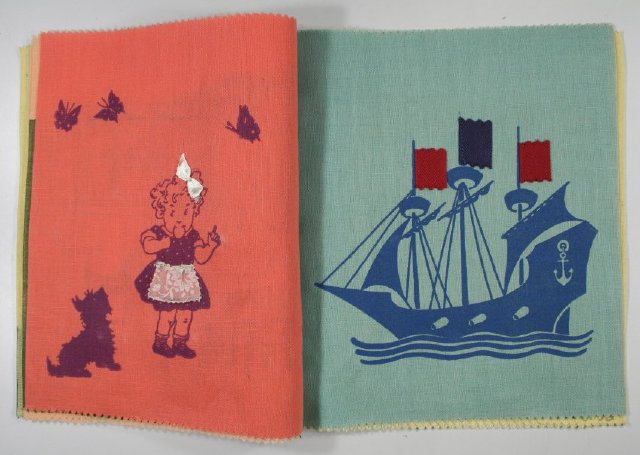
One of the earliest tactile books published may have been "Cottontails - A Tactile Book" dated to 1938, a copy of which is preserved in the Bennington Museum. As you can see, it features tied binding, beads, pom-poms, buttons, fabric, ribbon, a bell, and what appears to be felt.


Image Source


Image Source


Image Source


Image Source


Image Source


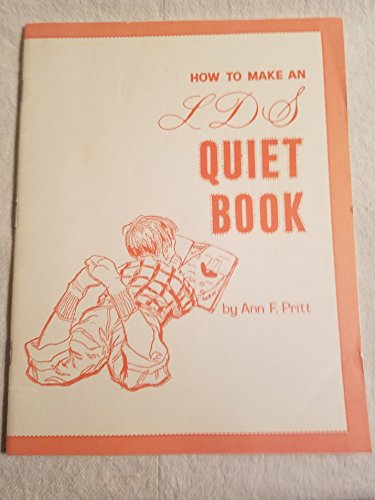
The earliest dated quiet book pattern I am aware of is by Ann F Pritt, copyrighted in 1967 to Deseret Book Company. She made a Mormon version because she noticed a lot of mothers bringing quiet books to church and wanted to promote a focus on scripture. You can download her pattern for free from The Idea Door website: How to Make an LDS Quiet Book by Ann F. Pritt


Image Source


Thanks to a lovely friend, I own a copy of  How to Sew A Quiet Book from Craft Course Publishers, copyright 1977. It is Craft Course SP-11 and says it was adapted from a book submission by Annelle Simmons. Many of the classic quiet book pages are included in her patterns and it is my guess that they were already established as classics before this publishing.


Image Source


In addition to the try my mitten and football lacing pages featured on the front cover, pages include pockets for a pad and pencil/crayons, flower buttoning, hair braiding, clothes on a washing line, a clock, a train, balloon colour matching, shape matching, 1-10 bead counting, bow tying on a kitten, a clown face to rearrange, and a zippered ladybug with babies.


Follow Faith and Felt Obsession on FacebookPinterest and You Tube

If you know of any earlier patterns or other information, I'd love to hear from you!

Friday, 24 August 2018

Ephesians 5 - Marriage Quiet Book Page

Ephesians 5 contains some good marriage advice and makes an analogy with marriage and Christ's relationship with His Church - the bride.


Memory Verse: " “For this reason a man will leave his father and mother and be joined to his wife, and the two will become one flesh.” This is a great mystery, and I am applying it to Christ and the church. Each of you, however, should love his wife as himself, and a wife should respect her husband.” Ephesians 5:31-33.

Materials needed to create the Marriage quiet book page:

  • A4 felt background sheet - I used yellow.
  • ivory satin scraps - mine came from my Mum's wedding dress to my Dad
  • wadding scraps
  • ivory lace edging
  • 5mm ivory ribbon scraps
  • Plastic wedding rings - I got mine from some Christmas bon-bons - bought from Supabarn if you live in Australia!
  • My free template
Using the template, cut out two pieces of satin and four pieces of wadding to size. Arrange the pieces in two piles on your page with two pieces of wadding stacked underneath each piece of satin. Pin each corner and side to the background felt. It may look bunched at this stage, but mine had no bunches when finished. I sewed around the edges twice using stitch no 13 on my sewing machine.


Melt the ends of your lace and ribbon to prevent fraying. Sew the lace to the edge to cover the stitching and turn the edge under at the end to get a nice finish. Don't forget the sew the lace on in the opposite direction on your second pillow in order to get a symmetrical look happening with the lace.

Sew your ribbons to the center of each pillow using a zig zag stitch with stitch length set to 0. Tie on your rings with a bow (then untie them and try them on)!

Finished!


Difficulty Level = Easy.

Just be sure to use plenty of pins to help prevent bunching of the pillows around the edges.


Wadding


Key Learning Areas and Skills

  • Ephesians 5 - marriage is an analogy to the relationship we the church have with Jesus!
  • Imaginative Play - a little girl's dream page
  • Threading - thread the rings onto the ribbons
  • Tie a knot/bow - use a knot and bow to keep the rings secured to the ring pillows
  • Fine Motor Skills - all quiet books encourage fine motor skill development
  • Hand-eye Co-ordination - all quiet books encourage hand-eye co-ordination


Read the Chapter

Ephesians 5


Devotional

I find it so validating that Paul in the Bible wrote about the differing love needs of men and women before modern research discovered them. It is well documented that generally men and women feel loved in different ways. A man needs to get respect to feel loved, a woman needs love.

Apart from "Men are from Mars, Women are from Venus" by John Gray which I found was great, one of the best books I have read on the topic of men is "Wild At Heart" by John Eldredge. He also has one about the girls which he wrote with his wife called "Captivating" - although I have not read this one.


Follow Faith and Felt Obsession on FacebookPinterest and You Tube

What colour background would go with your toy rings? Love to read in your comments below.

Wednesday, 15 August 2018

Genesis 2 - Adam Names the Animals Quiet Book Page

In Genesis chapter 2, God asks Adam to name the animals.


Memory Verse: “Then the Lord God said, “It is not good for the man to be alone. I will make a helper who is just right for him.” Genesis 2:18

Materials needed to create the Adam Names the Animals quiet book page:

  • A4 felt background sheet - I used light green.
  • Stiffened felt - I used black.
  • Wonderwall (or Veltex and double sided iron-on interfacing) scrap - I used light grey.
  • Velcro sticky dots
  • hot glue and glue gun
  • sewing thread to best match the page
  • Tangram template from webdelmaestro.com - they also have the image below which demonstrates how to make a heap of animal shapes out of the tangram which goes perfectly with this page

Image Source

Sew your Wonderwall to the background page, leaving enough room for a colourful border and to allow you to sew your pages back to back once you are ready to sew the book together.

Cut out the shapes from the template and use the paper pattern to cut the shapes out from the stiffened felt. It is probably better to make your size smaller than mine so you have room rearrange the shapes on your page.

Cut your Velcro dots in half and attach the Velcro dot to the same sides of the stiffened felt shapes so that they will fit together to form a square when you are done. You will need to use a little hot glue to hold them in place as the sticky will wear out rather quickly.

Stick your shapes onto the Wonderwall with the Velcro and re-arrange to make all sorts of animals. They should all fit on the page for storage purposes.

Finished!


Difficulty Level = Easy, plus No Sew version.

A very easy quiet book page!
Just use hot glue wherever sewing is recommended for a no sew version.


Key Learning Areas and Skills

  • Genesis 2 - God asked Adam to name the animals, what an awesome job!
  • Imaginative Play - animals are so much fun to imagine with
  • Shapes - tangram, square, triangle, parallelogram
  • Puzzle - place the tangram shapes in a way that will form a picture and then back into the shape of a square
  • Fine Motor Skills - all quiet books encourage fine motor skill development
  • Hand-eye Co-ordination - all quiet books encourage hand-eye co-ordination


Read the Chapter

Genesis 2


Devotional

Some people say that you can't appreciate the good without experiencing the bad. I'm not sure if I agree.

I can see that experiencing bad can enhance your appreciation of the good. But does that mean that if Adam and Eve had never fallen and evil had never entered the world that we would not have appreciated the goodness in the world around us? God pronounced everything He had made "good" and when it was finished, it was "very good". If it is not possible to appreciate good without evil then I think it was not possible to make a decision on the matter, and yet they were required to. Therefore it is possible to appreciate good without experiencing evil.


BOB DYLAN - (COVER)
MAN GAVE NAMES TO ALL THE ANIMALS


Nevertheless, it appears that lack of good may increase your appreciation for good. In Genesis 2, God demonstrates to Adam that he is lacking something before He provides that something. Before God creates Eve, He asks Adam to name all the animals - who all have a mate.

The willingness of Jesus to die for our sins on the cross is the most abhorrent thing possible. We deserve such a death and yet the Crown Prince who is and has always remained perfectly innocent endured a torturous death. Evil is so destructive that it reached all the way to the top and resulted in the death of the Creator. Yet goodness demonstrated it's superiority to evil in that even death of the life-giver could not defeat LIFE itself.


A very interesting talk about the Hebrew alphabet and how the letters give pictorial meaning to the words. It talks about Adam naming the animals :)


Follow Faith and Felt Obsession on FacebookPinterest and You Tube

I would love to hear from you!

Tuesday, 10 July 2018

How To Ring Bind Felt Quiet Books - Free A4 Buttonhole Guide

One of the reasons I chose to use felt pages my quiet books was because they are so simple to sew together.


I sew my Bible Quiet Book Project pages back to back and insert a ribbon tag to use to thread rings through. This allows me to completely disassemble my pages if anything requires fixing.

When I am making a book for someone else however, I usually use buttonholes instead. Threading the rings through buttonholes seems to keep the book more sturdy and keeps the pages lined up better. The rings pictured below are 50mm Album Rings from Daiso. You can get smaller rings, sometimes called split rings or hinged rings from places like Spotlight in the scrapbooking section, and sometimes in office supply stores.


In case you would like to follow the buttonhole binding method, I have uploaded a free A4 Buttonhole Guide to make lining up your buttonhole quick and easy. You will need to print it out and copy the hole spaces onto card stock and cut them out. Use this as a template to mark where you want your buttonholes to go. I did mine in pen, but it is best to use chalk or fade-able pen so there is no chance you will see the marks later.

My sewing machine has a one-step buttonhole setting, and I used a female Kam Snap as the button at the back of the buttonhole foot to get the correct sized buttonhole for this guide.


Thanks to my friend who allowed me to use her Betty Lukens felt activity book kit as an experiment! Have a good look at the next lot of page spreads to see if you notice what my experiment was:


You may have to click on the photos to make them big enough to notice. Post your guesses in the comments below! 
Follow Faith and Felt Obsession on FacebookPinterest and You Tube

The quiet book owner having a Michelangelo moment with St Peter


Follow Faith and Felt Obsession on FacebookPinterest and You Tube

How do you prefer to bind your quiet books?