While it may at first appear that there is not a lot of readily available information about the history and development of quiet books, I have been able to find some quite interesting details regarding their evolution.
Firstly I would like to draw your attention to a very informative article The History of the Bendable, Durable, Chewable Board Book by Olivia Campbell on the LIT HUB website. She talks about the results of technology development and the financial access it brought to books and toys as well as a dramatic paradigm shift that occurred in relation to children and books in general. It is an interesting read.
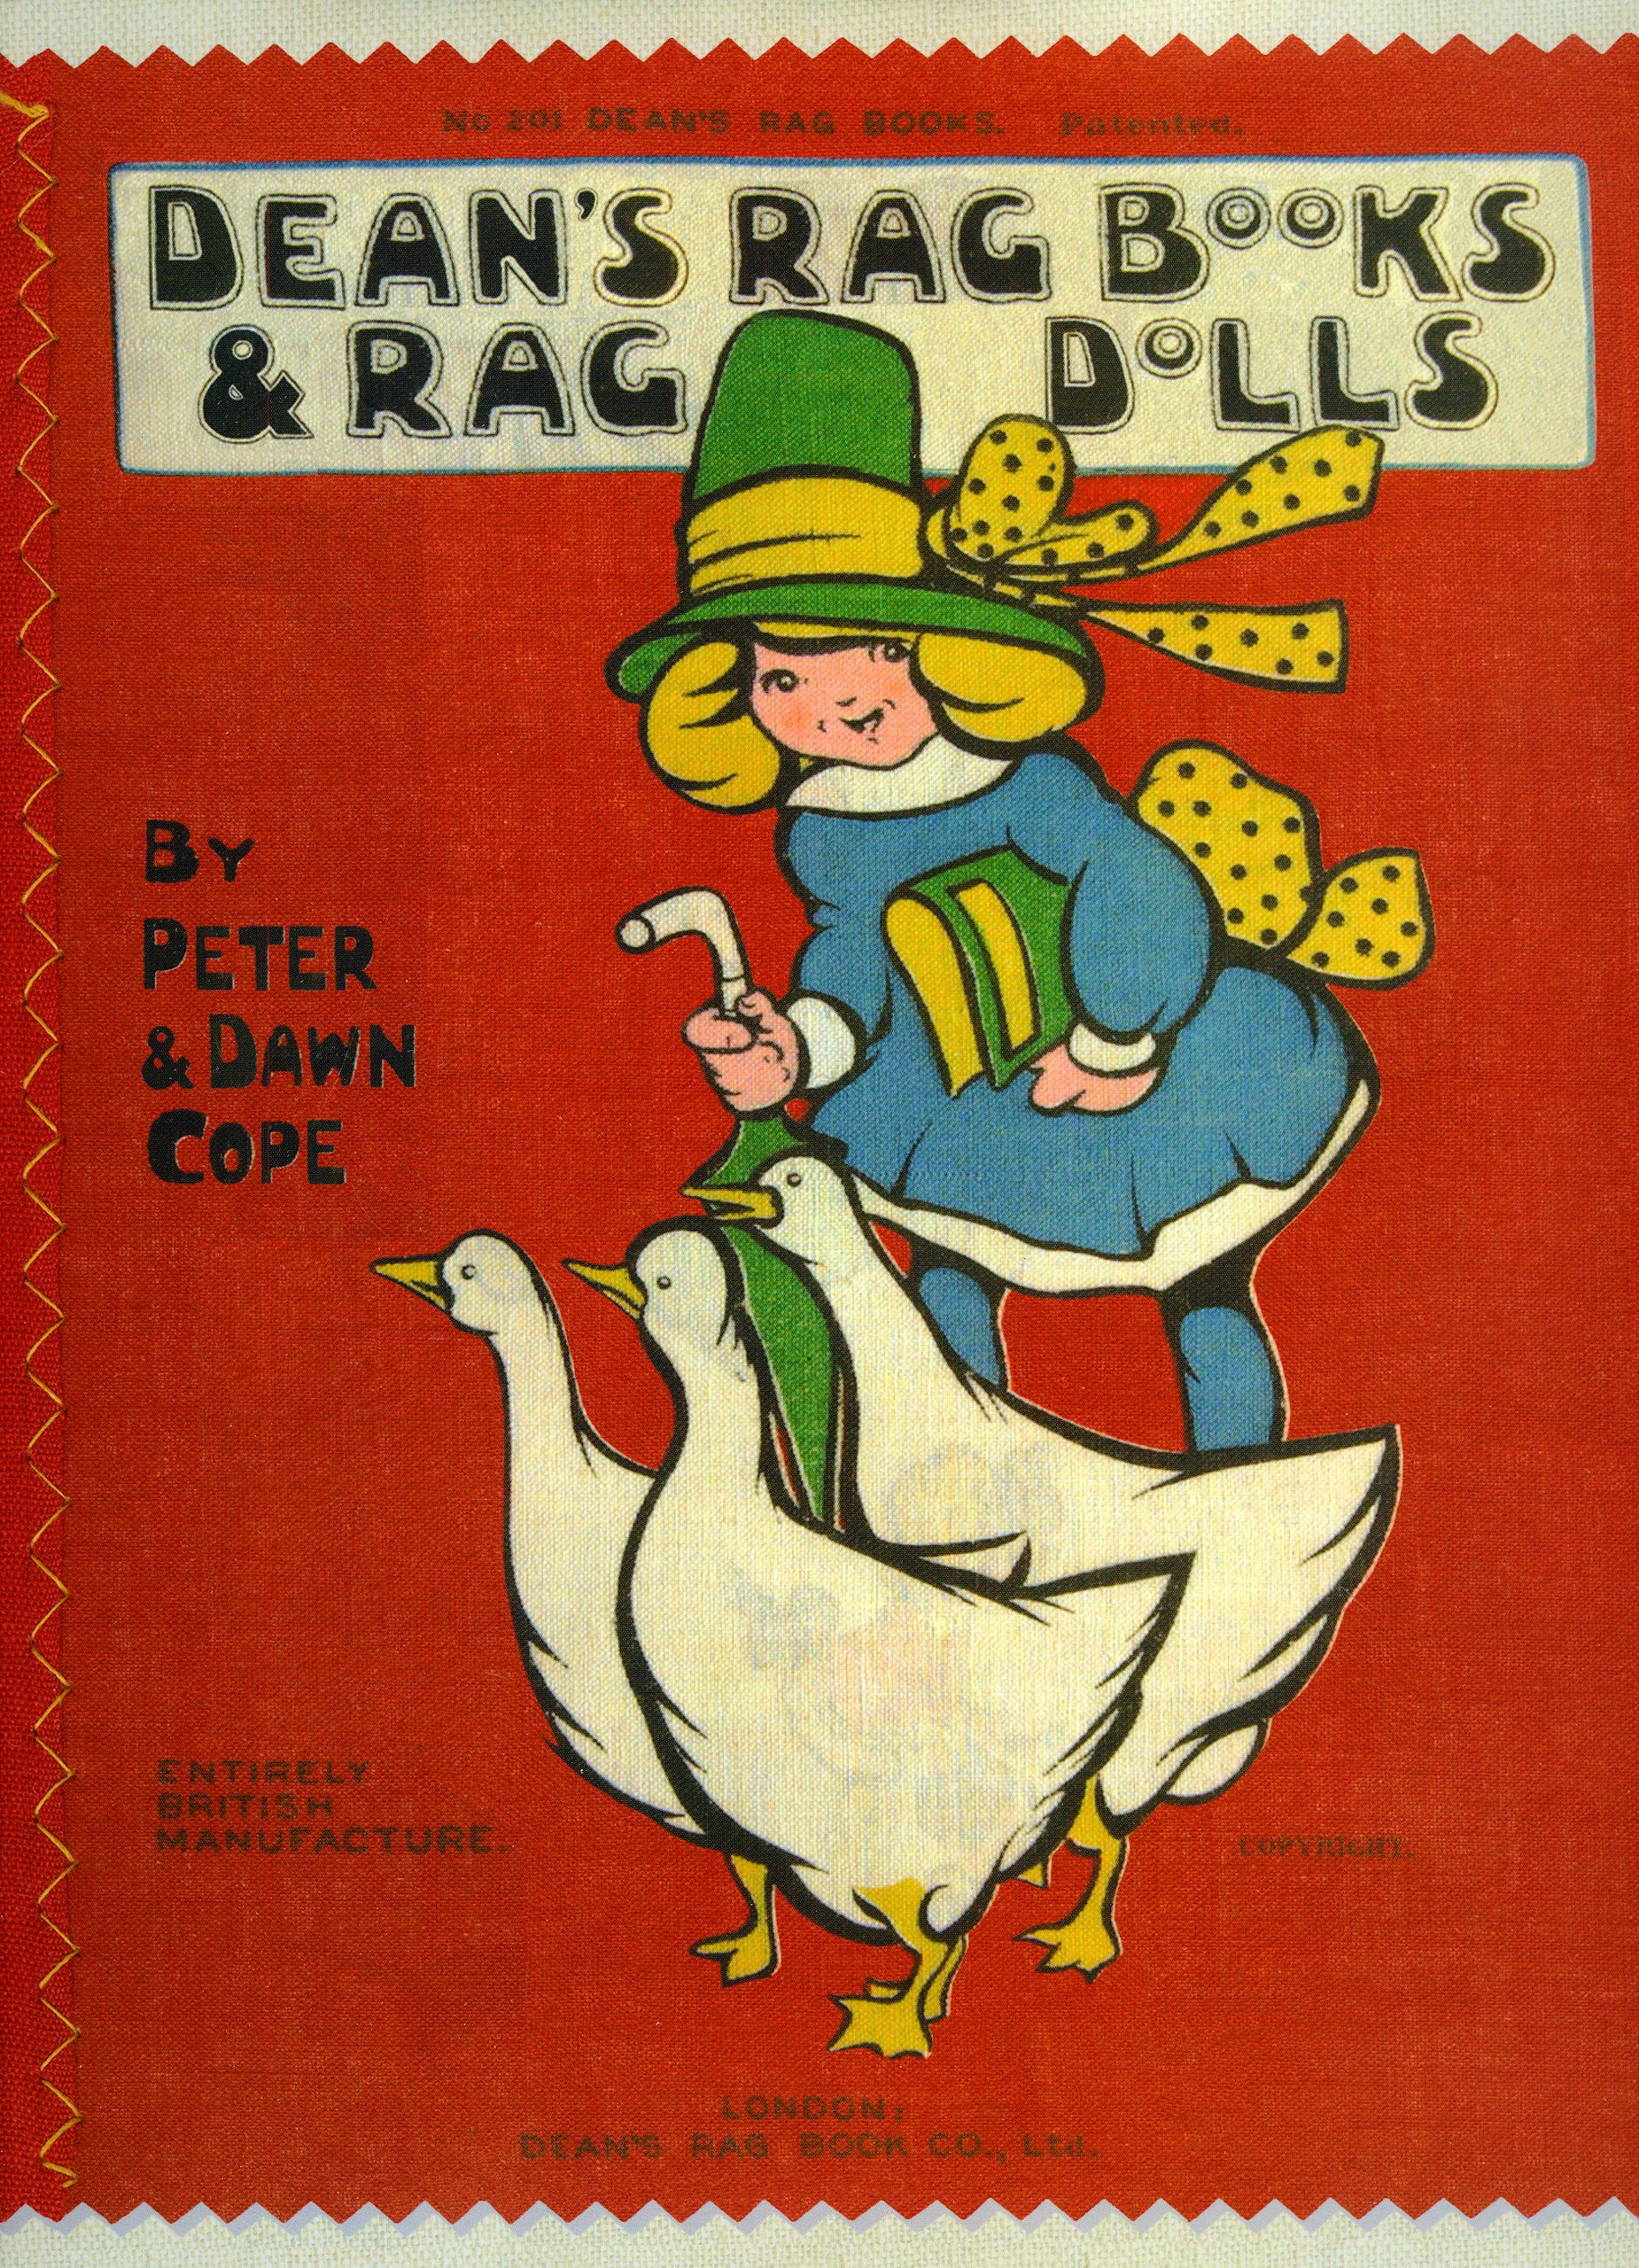
In 1902, Dean's Rag Books Company was formed, publishing the first printed cloth books. They had pinking sheared edges and were advertised as being indestructible. Unlike paper books, the pages could not be torn and/or eaten by children and they could be washed, sterilized, and slept with comfortably. The company went on to produce printed panels which could be sewn into a book by the purchaser. They extended this idea to their traditional book range and made cut out model books out of card which buyers could put together themselves. See The Brighton Toy and Model Index for more details on Dean's Rag Books Company or the book on it's history pictured above.
Dean's Rag Book Company was an offshoot of the Dean & Son book publishing company founded not long before 1800. The University Libraries website credits them with publishing the first movable books, including pop-up books, pull-tab books, and pantomime toy books. Dean's Rag Books Company does not seem to have incorporated these ideas into their cloth books.
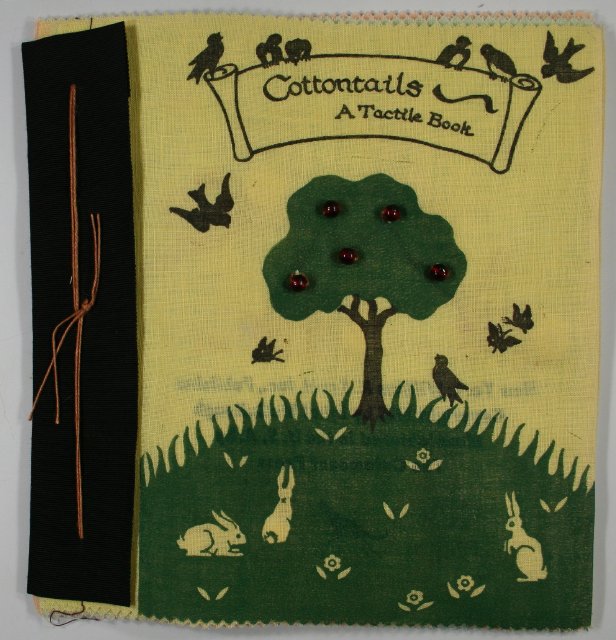
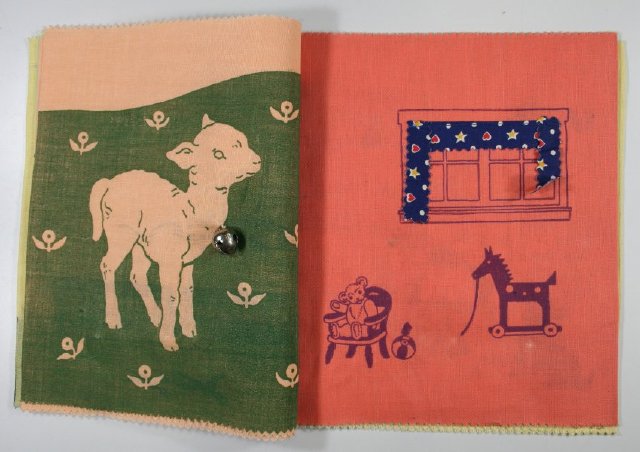
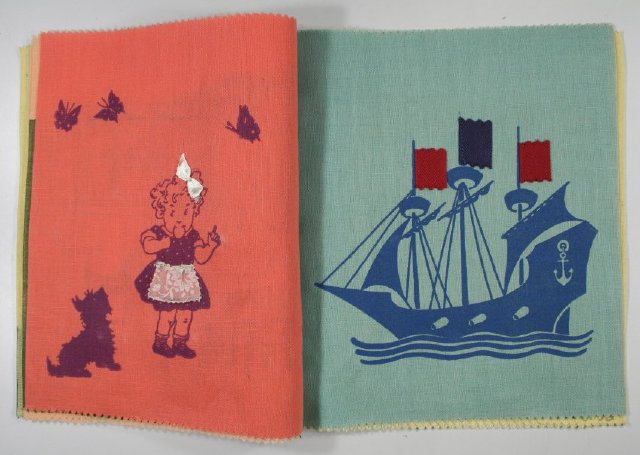
One of the earliest tactile books published may have been "Cottontails - A Tactile Book" dated to 1938, a copy of which is preserved in the Bennington Museum. As you can see, it features tied binding, beads, pom-poms, buttons, fabric, ribbon, a bell, and what appears to be felt.
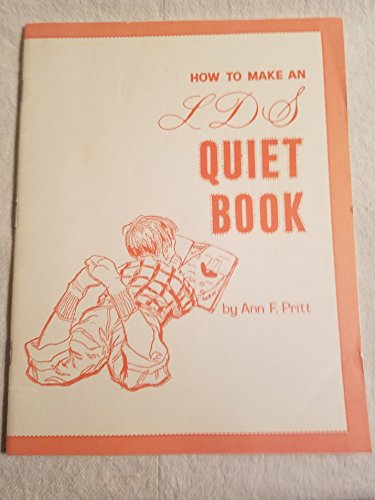
The earliest dated quiet book pattern I am aware of is by Ann F Pritt, copyrighted in 1967 to Deseret Book Company. She made a Mormon version because she noticed a lot of mothers bringing quiet books to church and wanted to promote a focus on scripture. You can download her pattern for free from The Idea Door website: How to Make an LDS Quiet Book by Ann F. Pritt
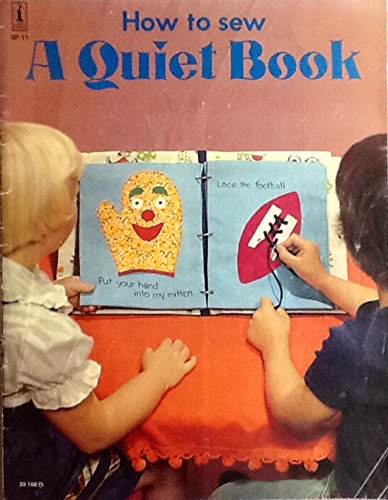
Thanks to a lovely friend, I own a copy of How to Sew A Quiet Book from Craft Course Publishers, copyright 1977. It is Craft Course SP-11 and says it was adapted from a book submission by Annelle Simmons. Many of the classic quiet book pages are included in her patterns and it is my guess that they were already established as classics before this publishing.
In addition to the try my mitten and football lacing pages featured on the front cover, pages include pockets for a pad and pencil/crayons, flower buttoning, hair braiding, clothes on a washing line, a clock, a train, balloon colour matching, shape matching, 1-10 bead counting, bow tying on a kitten, a clown face to rearrange, and a zippered ladybug with babies.
Ephesians 5 contains some good marriage advice and makes an analogy with marriage and Christ's relationship with His Church - the bride.
Memory Verse: " “For this reason a man will leave his father and mother and be joined to his wife, and the two will become one flesh.” This is a great mystery, and I am applying it to Christ and the church. Each of you, however, should love his wife as himself, and a wife should respect her husband.” Ephesians 5:31-33.
Materials needed to create the Marriage quiet book page:
A4 felt background sheet - I used yellow.
ivory satin scraps - mine came from my Mum's wedding dress to my Dad
wadding scraps
ivory lace edging
5mm ivory ribbon scraps
Plastic wedding rings - I got mine from some Christmas bon-bons - bought from Supabarn if you live in Australia!
Using the template, cut out two pieces of satin and four pieces of wadding to size. Arrange the pieces in two piles on your page with two pieces of wadding stacked underneath each piece of satin. Pin each corner and side to the background felt. It may look bunched at this stage, but mine had no bunches when finished. I sewed around the edges twice using stitch no 13 on my sewing machine.
Melt the ends of your lace and ribbon to prevent fraying. Sew the lace to the edge to cover the stitching and turn the edge under at the end to get a nice finish. Don't forget the sew the lace on in the opposite direction on your second pillow in order to get a symmetrical look happening with the lace.
Sew your ribbons to the center of each pillow using a zig zag stitch with stitch length set to 0. Tie on your rings with a bow (then untie them and try them on)!
Finished!
Difficulty Level = Easy.
Just be sure to use plenty of pins to help prevent bunching of the pillows around the edges.
Wadding
Key Learning Areas and Skills
Ephesians 5 - marriage is an analogy to the relationship we the church have with Jesus!
Imaginative Play - a little girl's dream page
Threading - thread the rings onto the ribbons
Tie a knot/bow - use a knot and bow to keep the rings secured to the ring pillows
Fine Motor Skills - all quiet books encourage fine motor skill development
Hand-eye Co-ordination - all quiet books encourage hand-eye co-ordination
I find it so validating that Paul in the Bible wrote about the differing love needs of men and women before modern research discovered them. It is well documented that generally men and women feel loved in different ways. A man needs to get respect to feel loved, a woman needs love.
Apart from "Men are from Mars, Women are from Venus" by John Gray which I found was great, one of the best books I have read on the topic of men is "Wild At Heart" by John Eldredge. He also has one about the girls which he wrote with his wife called "Captivating" - although I have not read this one.
In Genesis chapter 2, God asks Adam to name the animals.
Memory Verse: “Then the Lord God said, “It is not good for the man to be alone. I will make a helper who is just right for him.” Genesis 2:18
Materials needed to create the Adam Names the Animals quiet book page:
A4 felt background sheet - I used light green.
Stiffened felt - I used black.
Wonderwall (or Veltex and double sided iron-on interfacing) scrap - I used light grey.
Velcro sticky dots
hot glue and glue gun
sewing thread to best match the page
Tangram template from webdelmaestro.com - they also have the image below which demonstrates how to make a heap of animal shapes out of the tangram which goes perfectly with this page
Sew your Wonderwall to the background page, leaving enough room for a colourful border and to allow you to sew your pages back to back once you are ready to sew the book together.
Cut out the shapes from the template and use the paper pattern to cut the shapes out from the stiffened felt. It is probably better to make your size smaller than mine so you have room rearrange the shapes on your page.
Cut your Velcro dots in half and attach the Velcro dot to the same sides of the stiffened felt shapes so that they will fit together to form a square when you are done. You will need to use a little hot glue to hold them in place as the sticky will wear out rather quickly.
Stick your shapes onto the Wonderwall with the Velcro and re-arrange to make all sorts of animals. They should all fit on the page for storage purposes.
Finished!
Difficulty Level = Easy, plus No Sew version.
A very easy quiet book page!
Just use hot glue wherever sewing is recommended for a no sew version.
Key Learning Areas and Skills
Genesis 2 - God asked Adam to name the animals, what an awesome job!
Imaginative Play - animals are so much fun to imagine with
Shapes - tangram, square, triangle, parallelogram
Puzzle - place the tangram shapes in a way that will form a picture and then back into the shape of a square
Fine Motor Skills - all quiet books encourage fine motor skill development
Hand-eye Co-ordination - all quiet books encourage hand-eye co-ordination
Some people say that you can't appreciate the good without experiencing the bad. I'm not sure if I agree.
I can see that experiencing bad can enhance your appreciation of the good. But does that mean that if Adam and Eve had never fallen and evil had never entered the world that we would not have appreciated the goodness in the world around us? God pronounced everything He had made "good" and when it was finished, it was "very good". If it is not possible to appreciate good without evil then I think it was not possible to make a decision on the matter, and yet they were required to. Therefore it is possible to appreciate good without experiencing evil.
BOB DYLAN - (COVER)
MAN GAVE NAMES TO ALL THE ANIMALS
Nevertheless, it appears that lack of good may increase your appreciation for good. In Genesis 2, God demonstrates to Adam that he is lacking something before He provides that something. Before God creates Eve, He asks Adam to name all the animals - who all have a mate.
The willingness of Jesus to die for our sins on the cross is the most abhorrent thing possible. We deserve such a death and yet the Crown Prince who is and has always remained perfectly innocent endured a torturous death. Evil is so destructive that it reached all the way to the top and resulted in the death of the Creator. Yet goodness demonstrated it's superiority to evil in that even death of the life-giver could not defeat LIFE itself.
A very interesting talk about the Hebrew alphabet and how the letters give pictorial meaning to the words. It talks about Adam naming the animals :)
One of the reasons I chose to use felt pages my quiet books was because they are so simple to sew together.
I sew my Bible Quiet Book Project pages back to back and insert a ribbon tag to use to thread rings through. This allows me to completely disassemble my pages if anything requires fixing.
When I am making a book for someone else however, I usually use buttonholes instead. Threading the rings through buttonholes seems to keep the book more sturdy and keeps the pages lined up better. The rings pictured below are 50mm Album Rings from Daiso. You can get smaller rings, sometimes called split rings or hinged rings from places like Spotlight in the scrapbooking section, and sometimes in office supply stores.
In case you would like to follow the buttonhole binding method, I have uploaded a free A4 Buttonhole Guide to make lining up your buttonhole quick and easy. You will need to print it out and copy the hole spaces onto card stock and cut them out. Use this as a template to mark where you want your buttonholes to go. I did mine in pen, but it is best to use chalk or fade-able pen so there is no chance you will see the marks later.
My sewing machine has a one-step buttonhole setting, and I used a female Kam Snap as the button at the back of the buttonhole foot to get the correct sized buttonhole for this guide.
Thanks to my friend who allowed me to use her Betty Lukens felt activity book kit as an experiment! Have a good look at the next lot of page spreads to see if you notice what my experiment was:
You may have to click on the photos to make them big enough to notice. Post your guesses in the comments below!
Start by using your template to cut out a piece of the patterned felt including the hole at the top. Pin this to the similar coloured felt and stitch it down around the outside and the hole. Cut it out including the hole.
Cut two lengeths of ribbon to reach across and past both edges the longest section of the tissue box. Melt the ends of the ribbon with a match to prevent fraying.
Pin the ribbon in position on top of the tissue box and sew them down. Fold the longer ends of the ribbon underneath the tissue box before pinning it to the background page and sewing it down around the outside edge only. Leave the hole open to allow you to fold and place the handkerchief inside.
Finished!
Difficulty Level = Easy.
This is a very basic page.
Key Learning Areas and Skills
Isaiah 25 - God cares about the tears we cry
Imaginative Play - pulling tissues out of a box is a pretty exciting thing to do for a toddler -then you can wipe everyone's tears with it too
Pulling - pull the tissue out of the box
Folding - older children can learn to fold the handkerchief so it fits nicely back into the tissue box
Tucking - tuck the folded handkerchief back into the tissue box
Touch and Feel - if you use a handkerchief edged with lace, it will provide sensory stimulation through varied textures
Fine Motor Skills - all quiet books encourage fine motor skill development
Hand-eye Co-ordination - all quiet books encourage hand-eye co-ordination
Wiping someone else's tears is rather personal. Our God loves to have a personal relationship with each of us. He often makes me laugh. He gets my sense of humour and He knows which verse to show me when I am feeling down in the dumps.
Sometimes you can't tell a soul in the world what you are going through or what is gnawing away at your peace of mind. But you can trust these secrets to the One who gave you life.
There is a saying "If you love something, set it free; if it comes back to you it is yours". He cared enough to create you, He cared enough to give you freedom, He cared enough to come rescue you. It's up to you if you want to return to Him and allow Him to wipe your tears and restore your status.
A quiet book cover can be a really simple design. Don't be intimidated with the amount of work required to make a quiet book. It is your book, so you decide the amount of work. There are many many page ideas which are simple to execute but will keep your children engaged in play.
These cover pages were made with very little effort. The shape of the cross easily identifies the subject matter of the book, and they can quickly be embellished with a little ribbon or some such.
I just used the normal stitch on the machine to sew this on top of the outer edge of the cross. I did consider putting it underneath, but it seemed like it might be difficult to keep in the right spot, so I opted for on top so I didn't end up with the background page showing through. I started at the short vertical line at the top left hand of the cross and ended in the same place, folding the last section of lace back on the underside to give a nice finish without any raw edges visible. It might have been better to start and end at the bottom edge to avoid being lop-sided. I think it turned out well anyway.
You can see a list of my easy pages by clicking on the Difficulty Level = Easy label in the right column.
Before I added the ribbons these red crosses on white backgrounds looked too much like first aid kits for my liking!
If you wanted the cover to be interactive you could always attach velcro to the back of the cross and attach it to the page. Another idea is to attach the ribbons on top with kam snaps. You could even make a weave-able cross out of several ribbons sewn at the left and top sides only.
Today I would like to introduce you to Brenda Dent and her Devotions Through Play quiet books. I saw how she was able to include a printed Bible verse in her books and just HAD to invite her to share her method with you though an Interview on Faith and Felt Obsession. Brenda operates the Creative Seamstress Shop in Tacoma, WA.
Devotions Through Play Quiet Book Video
Carissa D: How did you get interested in making quiet books?
Brenda: Got interested in Quiet Book sewing because they are colorful and entertaining even for me. Is a great distraction from nursing and I am in midst of retiring in 2-3 years. Thinking about starting a sewing business. Just something to do when retire from, as of now, 48 years of nursing. Love being imaginative and sewing since age 11. Altering my own clothes was essential due to then, my large size. And then had a little sister who laid on floor (sucking her fingers) asking me to make her a dress. I instead made her pajamas. Her pajamas were made by laying fabric on the floor, spreading arms out, like an angel, cutting around her. Then sewing the seams, elastic around neck and wrists, and hem. Well, she loved them, and made these requests every time I opened the sewing machine. My mom noted the talent and began buying patterns, sewing by their instructions and making dresses for rest of sisters and me. I did take a class in Home Economics, but did not ace the class because I had already developed techniques that were not favorable to my teacher.
Carissa D: I love your story about how you learned to sew by making things for your little sister :) does she sew too?
Brenda: Haha. No my sister does not sew.
Carissa D: What inspired this particular quiet book?
Brenda: I became inspired to sew a "Lutheran Quiet Book" because noted little resources for "Lutheran " version of a quiet book. I began making them for new babies in my church after baptism. I also sold them at a local store who sold local home made items. I then changed the name to "Devotions Through Play". They sold like 'hot cakes'.
Carissa D: Where did you get your ideas and did you use any templates?
Brenda: Ideas originally came from templates but refashioned them to the Lutheran teachings. Being a Sunday School teacher, in my high school and college years, promoted the idea of attaching God's word while a child plays.
I think that is why this quiet book stands out because it is learning His Word through play; Reading bible references/stories, hymns, and excerpts from the Lutheran Catechism. Promotes parent and child to spend time together, inspire child to learn, and remind parent of The Word of God.
Carissa D: I am totally loving the method you came up with for adding the written Bible verses to your pages. Could you please explain to everyone how to do this?
Brenda: I transfer bible verses to 'Light' Fabric transfers by AVERY. Just follow directions. Then I Iron the transfer on to a light cloth,I use muslin, then sew on to the page.
Carissa D: What encouragement can you give to anyone wanting to make a quiet book for someone special in their lives?
Brenda: This activity book is great for any ladies church group, where each person can sew a pattern or activity and one other can design a cover. Less work and time. Then all bring pages and place in the cover and present to a new parents of a child who has been baptized. This book is geared for 18 months to 3 years, so you have plenty of time for production. These pages do not necessarily require sewing, activity page can be done with painting and pasting. There are plenty of templates out there for free for references.
Carissa D: Feel free to give your business a plug!
Brenda: Please visit astitchintimecreations.biz. My business is thriving called Creative Seamstress Shop. I mend, sew, tailor, and create custom requests; jean bags out of a father's old jeans for a couple of sisters after his death, activity blankets/aprons for people with Alzheimer's, and make angel gowns for infant deaths to support families during grieving. These gowns/cocoons are donated to hospitals or given to those who request them.
Thank you so much for sharing with us Brenda! I love that you were able to find an easy way to include writing in your quiet books. It is often quite a difficult thing to do without an embroidery machine, which many of us do not own. But you have solved the problem. Well done!
Here is one of Brenda's activity aprons for Alzheimer patients. They are much like a quiet book or a fidget quilt to help exercise the minds of our dear oldies, but aprons are a little more practical as they cannot get lost. Terrific idea.
In Australian primary schools it is very common to have a yearly Easter Hat Parade competition. Each child makes or decorates a hat at home to wear in the parade at school. I remember them when I was a kid.
Now that its my turn to supervise the hat making, as a Christian I couldn't bring myself to make a hat full of eggs or bunnies. In an effort to make the most of the opportunity, and try to teach Tahlia how to share her faith, we made a Palm Sunday Easter Bonnet.
When I told my friends I wanted to make a Christian themed Easter Hat, they all immediately thought of putting a cross on the front of a hat. Kinda morbid looking next to a bunch of brightly coloured and fun filled Easter Hats. Of course I didn't want to embarrass Tahlia, and it's probably not the greatest method of convincing people that the Christian movement is something they should join either!
I think we came up with a hat that is equally bright and rivals the fun of any Easter Hat I've seen.
I would love to see and share your Christian themed Easter Hats!
It is made of painted paper mache molded over a hat and bucket. We made the rim and Jerusalem gateway arch out of aluminium foil, and paper mache over the top. The sign saying "Welcome to Jerusalem" is made from a painted pop stick and marker, and is hung with some elastic and hot glue.
The battery operated car and track are from one of Tahlia's toys. Jesus on the donkey and the crowd are finger puppets copied and laminated from the book Bible Stories by Twin Sisters Productions, 2005. We used plain old sticky tape to attach them to the hat (and car so Jesus can actually ride the donkey). And as you might have guessed we used felt and hot glue to make the palm tree trunks (and a cardboard hand towel roll for the top one). She wanted the tall one on top because there was a 'Tallest Hat' category. The palm branches are also felt hot glued around some pipe cleaners. They can be taken out and laid on the road or waved around while shouting "Hosanna!"
This hat was inspired by a quiet book page which I am yet to post on the blog. When I do, I'll put a link to the post so you guys can get the template for the palm leaves.
We had a great time making the hat together. Stay tuned for the next few years to see what else we come up with, and if you have any suggestions or requests, please let us know in the comments below!
Cut out all the pieces for this page and the page itself from the Betty Lukens set. The Betty Lukens FAQ section has posted a cutting tips PDF.
Sew the Betty Lukens page onto the background felt along three sides, leaving the top edge open to form a pocket. Pop the pieces inside the pocket (or better yet - play with them)!
Finished!
Difficulty Level = Easy, plus No Sew version.
A very easy quiet book page!
Just use hot glue wherever sewing is recommended for a no sew version.
Key Learning Areas and Skills
Genesis 1 - Learn the order of events on each day of creation week
Matching - Match each piece to the corresponding spot for each day of creation week
Fine Motor Skills - all quiet books encourage fine motor skill development
Hand-eye Co-ordination - all quiet books encourage hand-eye co-ordination
There are heaps of patterns in the days of creation. The most basic is that in the first three days God creates a space, and days 4-6, He fills those spaces. There are lots of other patterns too, such as numbering some days by their cardinal numbers, and others by their ordinal number. Such an interesting study.
I have discovered that the days of creation, aside from being literal, are actually a prophecy of the Earth's history and coming events.
Day 1 - God created light and separated light from darkness
Millennium 1 - Adam and Eve chose between light and darkness
Day 2 - God separated the waters above and below with a vault (the sky)
Millennium 2 - The Flood occurred
Day 3 - God made dry ground to appear, and vegetation grew on the land
Millennium 3 - God made dry ground appear for the Israelite's to cross the red sea after the Exodus, and the Earth was re-populated after The Flood. David is promised a descendant who will be a branch...
Day 4 - God created the greater light and the lesser light (sun and moon) and the stars
Millennium 4 - Jesus was born and lived (the Sun of Righteousness), announced by John the Baptist (the moon), and the earlier part of this period was characterized by the prophets (perhaps represented as the stars) or perhaps Abraham's descendants have now become a nation and are now as numerous as the stars).
Day 5 - God filled the water and sky with birds and fish
Millennium 5 - The Gospel went to the gentiles
Day 6 - God made the animals and Adam and Eve
Millennium 6 - The Gospel continued to go to the gentiles, and perhaps the second Adam (Jesus) will return (my guess is at the edge of the 6th and 7th Millenniums).
Day 7 - God rested
Millennium 7 - God will provide rest for His people during the thousand year respite/Sabbath in Heaven (after which we return to Earth - re-created for our eternal home).
It's pretty cool when you start recognizing patterns in the Bible and find something like this.
Anyway, if you want some great scientific evidence articles (journal, lay and children's) regarding the young Earth and literal days of creation, you can find some great stuff at Creation.com and Answers in Genesis.