Showing posts with label threading. Show all posts

Thursday 29 October 2020

Easy Peasy To the Moon and Back Quiet Book Page

Do you sometimes wonder why you went to so much effort making a quiet book page when your little one prefers the simplest page in the book? 

I think this page is suited to a child around the age of four, but older children will still have tonnes of fun with it too. They do need to be old enough for you not to worry about them wrapping the cord around their neck and choking on it if you are going to let them play with it unsupervised, however.


How to make my To The Moon and Back quiet book page:

Materials needed:

  • velour in gray
  • thread to contrast or match for the edges
  • background fabric
  • 60-100cm cord/ribbon
  • rocket button
  • hot glue and glue gun

Cut out the template from my To The Moon and Back Quiet Book Page Free Template Pattern.

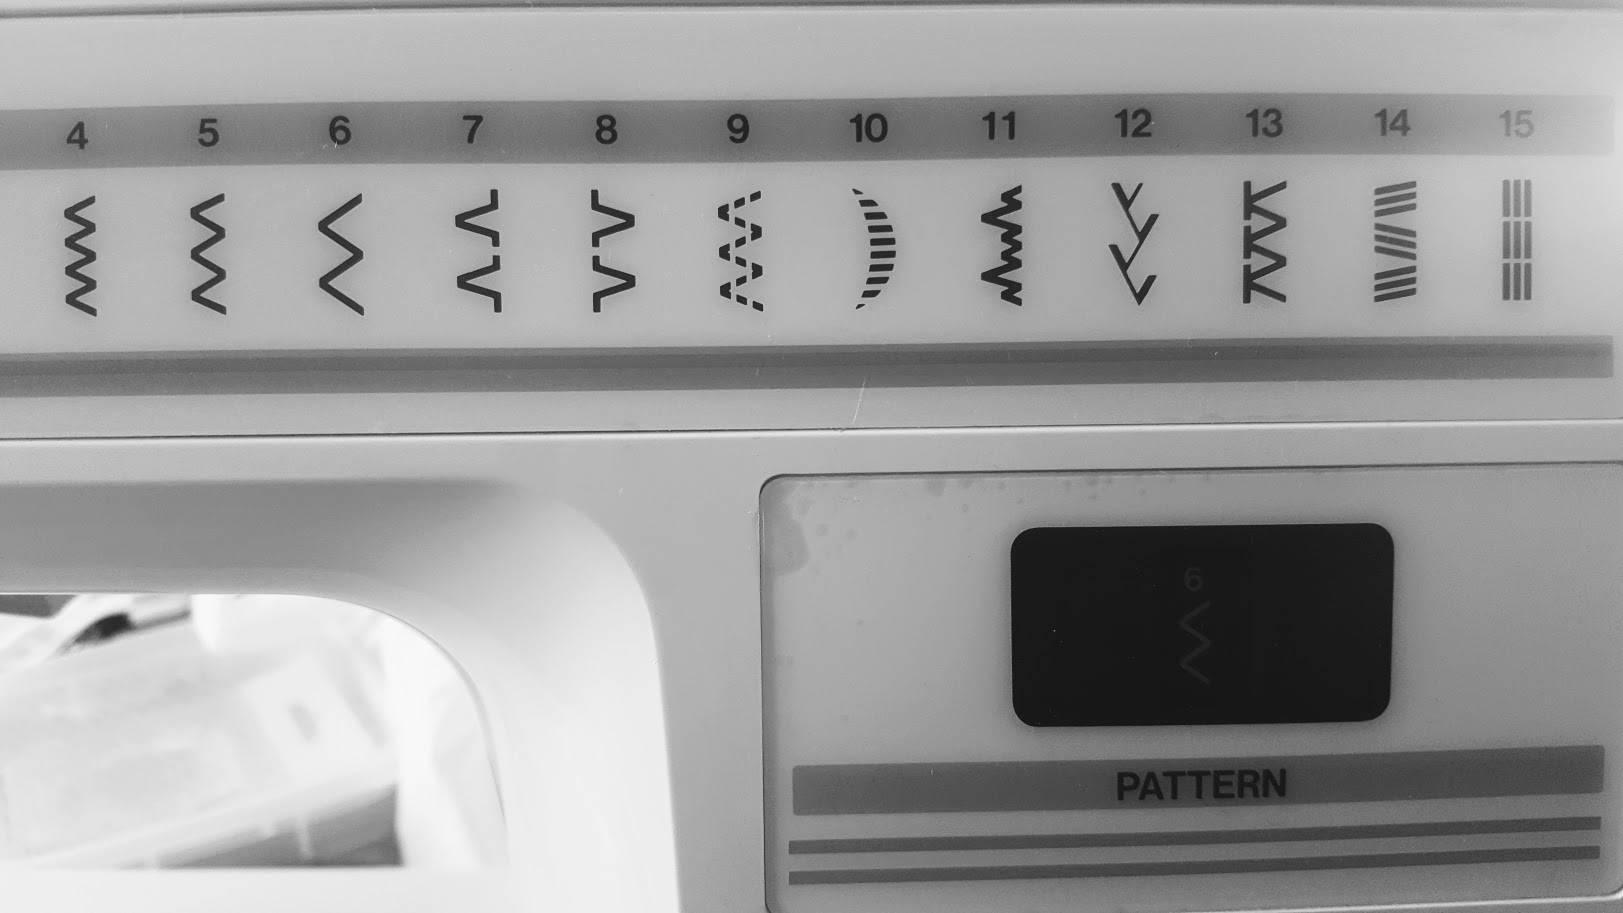
I used a pen to copy the template onto the back of my velour fabric and sewed zig zag off the edge of the holes after they were cut out, but you could definitely do it before and then cut out the holes too. 


I sewed the cord onto the rocket button and then hot glued the loose sections at the back of the button as well, just to make sure it would stay attached and not get in the way when threading. Sew the moon onto your background fabric using zig zag stitch along the outside edge, tucking the other end of the cord under one section. Leave the craters open to allow the rocket to thread it's way in and out through there as well.


I made this version for a cheeky little girl. Her name is Jannali, which is an Australian Indigenous name meaning "the Place of the Moon". I hope she gets a lot of fun out of it and it keeps her quiet when her Mama needs a break.

I think it made a good front cover.


Join a sew along!

This page is so easy and it comes together very quickly, especially if you use a button for the rocket. We did this page one month in my Facebook Group Quiet Book Sew Along. If you want to join in the fun, join the group, go to the events tab and mark yourself as attending, print the pattern and post your progress photos in event thread. It is a great way to keep yourself motivated, and you can ask all the questions you need and get advice from other quiet book makers.


Follow Faith and Felt Obsession on FacebookPinterest and You Tube

What do you think - does it look easy peasy? 

Thursday 27 February 2020

Psalm 29 - Enthroned Above The Flood Quiet Book Page

Psalm 29 reassures us the God is both powerful and in control. He sits enthroned above the flood.


Memory Verse: “The Lord sits enthroned over the flood; the Lord is enthroned as King forever." Psalm 29:10 NIV


Materials needed to create the Enthroned Above The Flood quiet book page:

  • A4 felt background sheet - I used blue
  • a Noah's ark and animals image - I used this printable from the article Sharing Time: The Prophet Will Tell Us in the LDS kids magazine Friend
  • felt in white, green, red and as close as you can get to gold
  • Kam snaps
  • ric rak
  • 30cm of 2mm round elastic
  • wooden cloud buttons - I bought these from AliExpress (not an affiliate link)
  • dotted mesh material
  • 40mm wide rainbow ribbon - I bought this from AliExpress (not an affiliate link)
  • gold pleather
  • clear craft glue if using pleather to make sewing easier - I used polyacetic acid & ethylene resin based glue
  • decorative beads
  • a throne template - I modified this Colouring page Saint Nicholas' throne from edupics.com
  • hot glue gun and glue

Firstly, get the Noah's Ark and animals transferred onto white felt by the sublimation printing and heat press method - see my post on Sublimation Printing on Felt - Test. Cut out the ark and animals and sew the ark onto the background page along three sides leaving the top open to form a pocket for the animals.

Prepare two wooden cloud buttons by threading 15cm of the elastic onto each and tying a knot to create a loop of elastic. Slide the knot to the back of the button and hot glue in place. Cut the ends short.


Cut your mesh material to size to fit inside your page with extra length (and width if you want to finish the edges first - I didn't but I wish I had). Fold the top over itself a couple of times and pin and sew along the top edge as shown above, placing the elastic of the buttons underneath at either end. Make sure the end is poking out the bottom so you can pull it up and over the buttons to hold the rolled up mesh in place later.


Measure your ground and make a few layers of grass for the animals to sit in. I used ric rak to edge the top of the grass as there would be too many layers of felt along the bottom if I doubled the felt as I usually do. Use kam snaps to attach the grass to the page. At the back, use small squares of spare felt to strengthen them and prevent them ripping a hole when being pulled.


Cut a length of rainbow ribbon to fit your page and melt the edges - see my post on How to Stop Ribbons Fraying. I rounded the edges, but you don't have to. Mark where the button holes should be on the ribbon, then sew and cut.


Use the a colouring page as a throne template to make your throne. Simplify the lines by joining some together and rounding off the top.


Before sewing the pleather, I used the glue to attach the pleather to a sheet of felt. My pleather was stretchy which makes it very difficult to sew. Allow the glue to dry before sewing in place. Then sew the red felt on top and cut out the front section of the throne. Decorate with beads at the top.


Make a slot for threading the throne onto the rainbow ribbon by doubling a piece of felt and sewing onto the other half of your sheet of felt. Make sure it is slightly wider than your rainbow ribbon to allow it to pass through easily. Hot glue the throne to the sheet of felt with the slot facing out and centered at the back. Cut out the throne once again.

Thread the throne onto the ribbon and button it on, or store in the ark pocket.

Complete!


Difficulty Level = Intermediate.

Pleather can be difficult to work with.


Key Learning Areas and Skills

  • Psalm 29 - God is in control even when it might seem like He is not
  • Rolling - roll up the rain, and roll it down again
  • Buttoning - secure the rain when it is rolled up with the elastic and cloud buttons, button on the rainbow ribbon
  • Threading - thread the throne onto the rainbow ribbon
  • Colours - learn the colours of the rainbow
  • Tucking - tuck the animals into the ark
  • Using snaps - snap on and off the ground to make it appear to flood
  • Fine Motor Skills - all quiet books encourage fine motor skill development
  • Hand-eye Co-ordination - all quiet books encourage hand-eye co-ordination


Read the Chapter

Psalm 29.


Devotional

Maybe you feel like everything is out of control, but God assures us that He's got it. Sometimes trouble is what we need to wake us up and turn our course. When trial comes are we willing to listen to instructions and build an ark? Or do we insist on our own way?

This Psalm speaks about God twisting the oaks and breaking the cedars. Trees are often used as a symbol of men and strength. So the strength of men is nothing to God. Therefore, why worry about what man can do to you? Rather worry about pleasing God.

Not only does God rule over the kaos of The Flood, but He caused it.


Psalm 29 - HeartSong


Follow Faith and Felt Obsession on FacebookPinterest and You Tube
Have you made a Noah's Ark quiet book page? I'd love to hear about it in the comments!

Thursday 1 August 2019

Why do hedgehogs feature so often in quiet books?

If you have an interest in quiet books, I'm sure you will have seen some of the many pages featuring hedgehogs.


In The Hoop With Lee sells this machine
embroidery design


I've been thinking about making a hedgehog page lately, but not because I like them. I don't!

I remember a post from a quiet book group on Facebook - Quiet Book hints, tips & ideas by one of the moderators, Cheri Chiles. She blogs over at Fabric and Memories and was wondering why hedgehogs always seem to get things stuck to them and if that was something that real hedgehogs got up to in their spare time. What is the point of doing that as a quiet book activity?! I totally hear you Cheri!! Hedgehogs in a quiet book - I'm just not a fan.

Ok... so why am I thinking of making a hedgehog page then? Good question. Someone I know keeps spoiling me and buying craft goodies online. And she adores hedgehogs. What better way to say thank you than create a quiet book featuring that somewhat-cute creature.

So what is the deal with hedgehogs and quiet books?

You Tube sensation Irina Sorokina of My Craft Quiet Books fame has the answer.  Both hedgehogs and quiet books abound in eastern Europe. Hedgehogs inhabit the forests and the fairy tales, and they are very popular with children. I'll leave a couple of folk tale examples below and then carry on with why they get to get stuff stuck to them.


Hungarian Folk Tales: The Hedgehog


Must Hedgehog Be Prickly? [1990]
Soviet cartoon with English subtitles


Irina also says that hedgehogs are predators and whilst they don't eat veggies, mushrooms or fruit, they do use them to repel insects. I found it a rather strange idea so I looked it up, and yes, it exists and is termed "self-anointing". The process often involves chewing things up with their saliva and coating themselves in the mix. It may also serve as a scent camouflage or type of chemical weapon! Ok, so maybe these pages are not so bad after all, but still, hedgehogs are just not part of my culture. I'd take a joey in a pouch over a bio-sludged hedgehog any day of the week.

If you think you might like to make your own hedgehog page, check out this helpful tutorial and free pattern from Irina below. Then you can self anoint the hedgehog to your heart's content.


My Craft - Quiet book tutorial:
"the hedgehog" page + template


Follow Faith and Felt Obsession on FacebookPinterest and You Tube

What do you think - do you love a good hedgehog quiet book page? Or are you with me?

Thursday 9 May 2019

Malachi 4 - Sun of Righteousness Quiet Book Page

Malachi 4 is the last chapter of the last book of the Old Testament and it looks forward to the dawning of the Sun of Righteousness - Jesus.


Memory Verse: “But for you who fear my name, 
the Sun of Righteousness will rise with healing in his wings." Malachi 4:2a


Materials needed to create the Sun of Righteousness quiet book page:

  • A4 felt background sheet - I used royal blue
  • felt scraps in sun colours, I used yellow, orange, red and maroon
  • lots of ribbon scraps in gold, yellow, orange, red, maroon, brown, pink or whatever colours go with your chosen felt colours
  • a pair of white shoelaces with blue flecks - I bought mine here in white blue (not an affiliate link)
  • my free Sun of Righteousness template download
Use the template to cut out four pieces of felt in coordinating sun colours. If your page size is smaller than mine, you can cut the template in half and make a quarter sun or use the smaller four layers and leave out the largest one. To make this page for the sun of righteousness, you need four layers only. If you are making a sun page in general, feel free to use all five layers.


If you are making the Bible version, you need all four ends of the shoelaces but one long length will suffice for a general sun page.


Cut up enough coordinating ribbons to fill the top edges of each layer, leaving room for a shoelace at one end of each. Melt the edges of your ribbons to prevent fraying.


Pin the ribbons leaving room for the shoelace under the yellow layer first. Before sewing them down, thread the shoelace through the ribbons to ensure you cut it at the correct length. Melt the end of the shoelace to prevent fraying.  Sew down the shoelace end underneath the layer before sewing down the felt on top of the ribbons which will secure them at the same time. Go backwards and forwards a couple of times in places where you are using thin ribbons to ensure they get caught in the stitching. Repeat this process for each layer, finishing with the smallest - alternate ends that the shoelace is located. Some ribbons thread easier from one direction than the other so ensure they are facing the right side for the shoelace location on that layer.


The first half explains how to sew this page and
the second half explains the spiritual significance.


Finished!

Difficulty Level = Easy.

Cutting the semi-circles straight across the bottom edge will enable you to line them up easier, however, it may add too much bulk to the lower edge of the sun where they are all piled up.

You may be able to use the sections cut out of the centers of the semi-circles if you want to swap the order of colours around and make a second page at the same time.


Using a lunch box with dividers can help you get organised for a TV pinning session on the couch.

Key Learning Areas and Skills

  • Malachi 4 - Jesus is the Sun of Righteousness with healing in His wings, the tassels remind us of the commandments
  • Threading - thread the shoelaces through the sun's rays
  • Counting - count the number of rays on each layer
  • Fine Motor Skills - all quiet books encourage fine motor skill development
  • Hand-eye Co-ordination - all quiet books encourage hand-eye co-ordination


Read the Chapter

Malachi 4


Devotional

In Numbers 15, God told Israel to make fringes on their garments and to put tassels on the four corners. The tassels had to have a blue thread running through them - so the shoelaces are meant to represent the tassels and the sun's ribbon rays are indicative of the fringes. The blue thread was to remind them to keep the commandments - something which seems a little odd don't you think? How does a blue thread remind you of the commandments??

The rounded shape depicting the tablets of the 10 commandments was probably introduced in about the middle ages by Christian artists.


Aron de Chaves \ de Chavez. Painter at Amsterdam in 1700.


However, both the Babylonian and Jerusalem Talmuds (Jewish commentaries on scripture) report that the shape was square. It was half as thick as it was wide and high so when both tablets were placed together they formed a cube. They were made from sapphire stone, which is why a blue thread is supposed to remind you of the blue stone of the commandments.


Image Source: A Layman Looks at the Word

Jesus would have worn a prayer shawl similar to the one below. The word for the tassels in Hebrew is the same word used in Malachi for "wings". The woman who had an issue of blood in Matthew, Mark, and Luke must have known this prophecy and believed Jesus to be the Sun of Righteousness therein. So she figured if she could just touch His tassels she would be healed. She was!


A tallit, or prayer shawl with fringes and
tassels - like Jesus would have worn


There were many people in the crowd no doubt jostling Jesus, but her touch drew power. Faith made the difference. It wasn't fancy - I doubt she even told anyone her plans. Her faith was silent until she had a story to tell.


Follow Faith and Felt Obsession on FacebookPinterest and You Tube

Have you heard about the "wings" on a prayer shawl before?

Sunday 4 November 2018

Genesis 12 - Abram's Journey Quiet Book Page

In Genesis chapter 12, God tells Abram to go to a place He would show him. I have included a few verses from chapters 11 and 13 here for convenience.


Memory Verse: "The Lord had said to Abram, “Go from your country, your people and your father’s household to the land I will show you." Genesis 12:1

Materials needed to create Abram's Journey quiet book page:

  • A4 felt background sheet. I used deep blue.
  • brown felt, plus tan scraps
  • sewing thread to match, plus blue for the rivers
  • a shoelace
  • crotchet rings
  • my free template


First place your map UPSIDE DOWN on your brown felt and trace around it with a pen.  This way the pen side will be face down...


...and the map will be the right way when placed on the background felt. Sew it down.

Next mark each point at which you will turn when sewing the rivers. I placed my template on top of my felt version and pushed in a pin at each turning point. I started at the branched ends and aimed for the entrance point of each pin when I got to each subsequent pin.


Sew down your pyramids and crotchet rings where indicated. For the crotchet rings I set my machine to zero length on zig zag stitch and secured them with about 20 stitches.

Measure the length of shoelace needed by threading it as shown in the first picture and  leaving enough of an end to stitch it down underneath the zigurat. Melt the ends of the shoelace to prevent fraying before using zig zag stitch to secure it to your page . Place the ziggurat over the end of the shoelace and sew down.

Finished!


Difficulty Level = Intermediate

This is a very easy quiet book page to sew, except for sewing the rivers. You might find this part easier if you do it by hand.


Key Learning Areas and Skills

  • Genesis 12 - This page tells the story of how Abraham obeyed God and moved his family to Canaan
  • Threading - thread the shoelace through the places mentioned that Abraham stopped at on his way
  • Fine Motor Skills - all quiet books encourage fine motor skill development
  • Hand-eye Co-ordination - all quiet books encourage hand-eye co-ordination


Read the Chapter

Genesis 12


Devotional

Abraham had already moved from Ur to Haran when God called him to move again. Moving can be a hard thing, particularly when leaving family - although sometimes it is the reason for the move! Perhaps it was one reason that God wanted Abraham to move, although maybe not. Whilst it is recorded in non-Biblical sources that Abraham's father was an idol worshiper and even owned an idol shop, it does seem that God waited until his death before instructing Abraham to leave.

It is also difficult to trust God and take those first steps when you can't see the end of the road. But God asked Abraham to go to a place that He would show him. Abraham didn't know where the road ended. But He decided to trust God anyway.

It ended up being a bit like a wander in the wilderness for him, and although he eventually ended up living in the promised land, the only piece of it he owned was a burial plot. I assume he could not build a house on land that did not belong to him, and that he continued to live in a tent for the rest of his long life.

There is a lot of pressure on people these days to buy their own home and people who are not able to often feel unsuccessful and like they lack something to show for their efforts. Circumstances are far from perfect and though someone works hard, often things don't work out how we plan. God wants us to remember that this earth is not our home - we are wanderers here. And if we live in a tent for the rest of our lives here that is quite OK. One day we will possess a 'mansion'.


Abraham's Exciting Journey - Song for the Kids


Follow Faith and Felt Obsession on FacebookPinterest and You Tube

I'd love to hear from you!

Friday 24 August 2018

Ephesians 5 - Marriage Quiet Book Page

Ephesians 5 contains some good marriage advice and makes an analogy with marriage and Christ's relationship with His Church - the bride.


Memory Verse: " “For this reason a man will leave his father and mother and be joined to his wife, and the two will become one flesh.” This is a great mystery, and I am applying it to Christ and the church. Each of you, however, should love his wife as himself, and a wife should respect her husband.” Ephesians 5:31-33.

Materials needed to create the Marriage quiet book page:

  • A4 felt background sheet - I used yellow.
  • ivory satin scraps - mine came from my Mum's wedding dress to my Dad
  • wadding scraps
  • ivory lace edging
  • 5mm ivory ribbon scraps
  • Plastic wedding rings - I got mine from some Christmas bon-bons - bought from Supabarn if you live in Australia!
  • My free template
Using the template, cut out two pieces of satin and four pieces of wadding to size. Arrange the pieces in two piles on your page with two pieces of wadding stacked underneath each piece of satin. Pin each corner and side to the background felt. It may look bunched at this stage, but mine had no bunches when finished. I sewed around the edges twice using stitch no 13 on my sewing machine.


Melt the ends of your lace and ribbon to prevent fraying. Sew the lace to the edge to cover the stitching and turn the edge under at the end to get a nice finish. Don't forget the sew the lace on in the opposite direction on your second pillow in order to get a symmetrical look happening with the lace.

Sew your ribbons to the center of each pillow using a zig zag stitch with stitch length set to 0. Tie on your rings with a bow (then untie them and try them on)!

Finished!


Difficulty Level = Easy.

Just be sure to use plenty of pins to help prevent bunching of the pillows around the edges.


Wadding


Key Learning Areas and Skills

  • Ephesians 5 - marriage is an analogy to the relationship we the church have with Jesus!
  • Imaginative Play - a little girl's dream page
  • Threading - thread the rings onto the ribbons
  • Tie a knot/bow - use a knot and bow to keep the rings secured to the ring pillows
  • Fine Motor Skills - all quiet books encourage fine motor skill development
  • Hand-eye Co-ordination - all quiet books encourage hand-eye co-ordination


Read the Chapter

Ephesians 5


Devotional

I find it so validating that Paul in the Bible wrote about the differing love needs of men and women before modern research discovered them. It is well documented that generally men and women feel loved in different ways. A man needs to get respect to feel loved, a woman needs love.

Apart from "Men are from Mars, Women are from Venus" by John Gray which I found was great, one of the best books I have read on the topic of men is "Wild At Heart" by John Eldredge. He also has one about the girls which he wrote with his wife called "Captivating" - although I have not read this one.


Follow Faith and Felt Obsession on FacebookPinterest and You Tube

What colour background would go with your toy rings? Love to read in your comments below.