Showing posts with label quiet book binding. Show all posts

Thursday 24 February 2022

Mischa's Felt Book - Interview with my 5 year old niece!

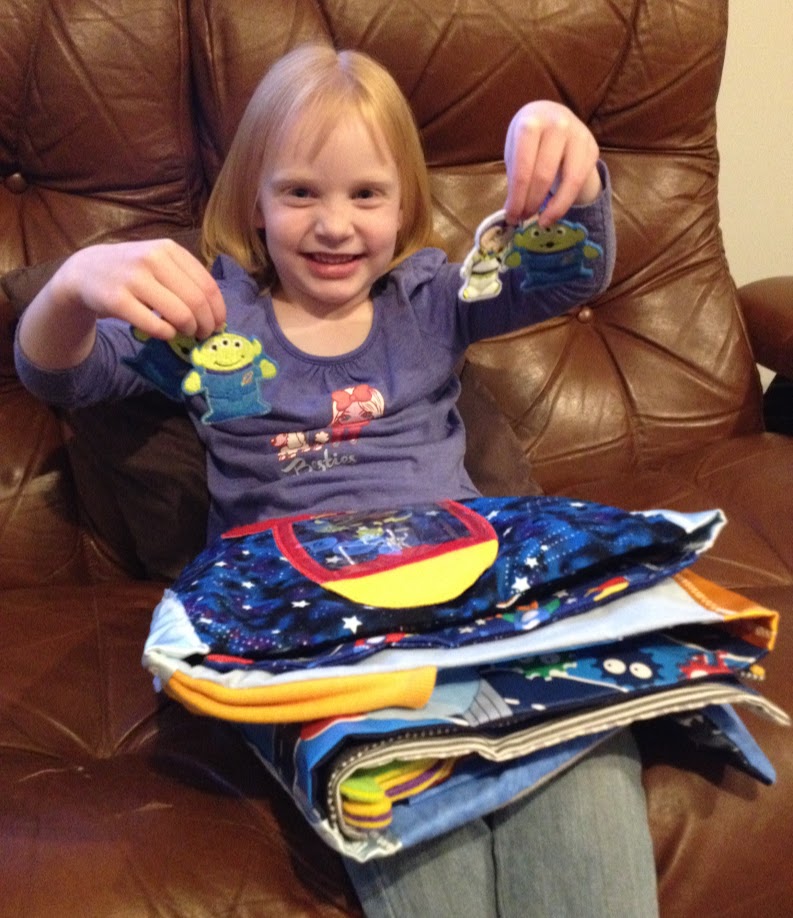
Today I would like to interview someone special - my five year old niece Mischa, who decided she wanted to make her own felt book. I sent my sister, Mischa's Mum, some questions for her to ask Mischa from me. She has clarified my questions in places below and sometimes I have included these remarks. I have tried not to do too much editing whilst making it flow well for reading purposes.


Carissa D: Mischa, you have made my heart swell with your desire to make a felt book, and it has turned out incredibly sweet. Why did you want to make a felt book?

Mischa: I thought it would be nice to have a look at it myself, at the pictures of it.

Carissa D: Can you tell me about the cover page?

Mischa: The front cover? Oh, a rainbow! 

Mischa's Mum: Does it have any writing on it?

Mischa: "Mischa's Felt Book".

My sister informs me that Mischa kept saying "Mischa's Felt Book - no writing" when they were titling the book. She thought that is what Mischa wanted to call the book, but thought better of it and left that part out, checking that she was happy with the end result. 

Mischa's Mum: Yeah, "Mischa's Felt Book - No Writing" (quoting Mischa from the labelling experience).

Mischa: It doesn't say no writing.

Mischa's Mum: No, but is that what you wanted it to say?

Mischa: No.

We'll come back to this topic later in the interview...


Carissa D: I see there are no bees on the bee page. Why is that? 

Mischa: 'Cause I didn't want to make one. 

Mischa's Mum: Too hard, or take too long, or just don't really like bees?

Mischa: Don't really want to make a bee. 

Mischa's Mum: Yeah, were you worried that it might sting you? 

Mischa: No!

I have offered Mischa two bees that Remy's Nanny made when we were making Remy's Quiet Book - My First One (but then decided against using them and opted for a bee button instead) to put in her felt book. She loves them, and who wouldn't!


Carissa D: The flowers are all beautiful. What do you like best about your book?

Mischa: Maybe the owl - it's cute. It looks cute when it's winking.

Carissa D: Which parts did you sew yourself?

Mischa: The stars. 

Mischa's Mum: Oh yeah, you did, didn't you. How was that?

Mischa: Fun. 

My sister says that the stars are a special stitch setting on her sewing machine. She says Mischa also hand sewed the buttons on and that she cut out half of the owl, but that the flowers were already cut. Mischa did some of all the sewing (except the rainbow), either guiding with her hands or pushing the foot (not both at the same time).

Carissa D: The other pages were inspired by things you found in Mummy's stash, but the owl was made from scratch. Why did you want to make an owl page?

Mischa: Cause I thought it would look  nice. 

Mischa's Mum: Yeah, what do you like about owls?

Mischa: 'Cause they look cute.

Carissa D: I really like how you paid attention to detail on the owl's eye and chose a sun patterned felt to get the effect of a real eye. What gave you that idea? 

Mischa: Well, I didn't really get the idea of it, I just found it. It would be the right thing for the felt book, for the eye for the owl. 


Carissa D: Why did you want the owl to be winking?

Mischa:  'Cause I thought it would look cute.

Carissa D: I have also noticed that there are no activities in this book. Is that for a reason?

Mischa: No.

Mischa's Mum: No, no reason?

Mischa: It's just I don't really want much writing in it cause I don't really know how to read.

Mischa's Mum: Oh, I understand, she doesn't want much writing in it cause she doesn't know how to read! That makes sense. Um, and what about things to do, like you didn't want the bee lacing thing or anything?

Mischa: Yeah, I didn't want the bee lacing. No.

Mischa's Mum: Why didn't you want anything to do in it?

Mischa: 'Cause I can't read it, what to say.

Mischa's Mum: Yeah okay, so you think activities have to involve writing?

Mischa: No, I just don't really want... (Here they get interrupted and we will all have to wonder what the answer to this question might have been)


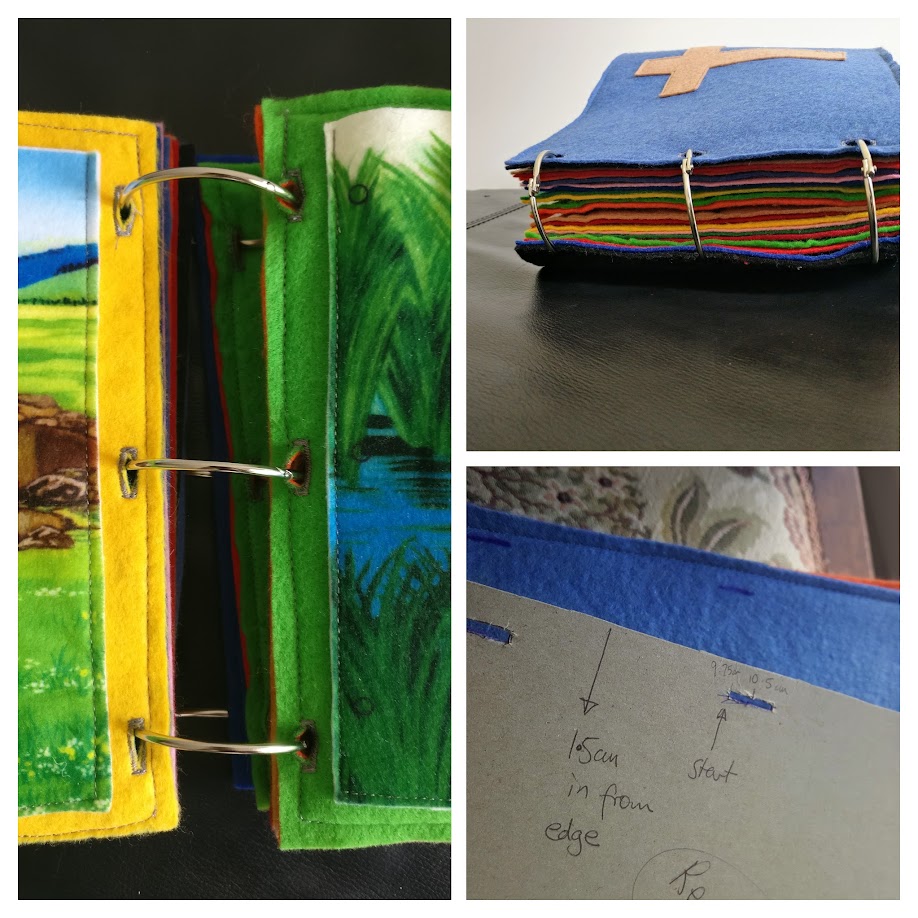
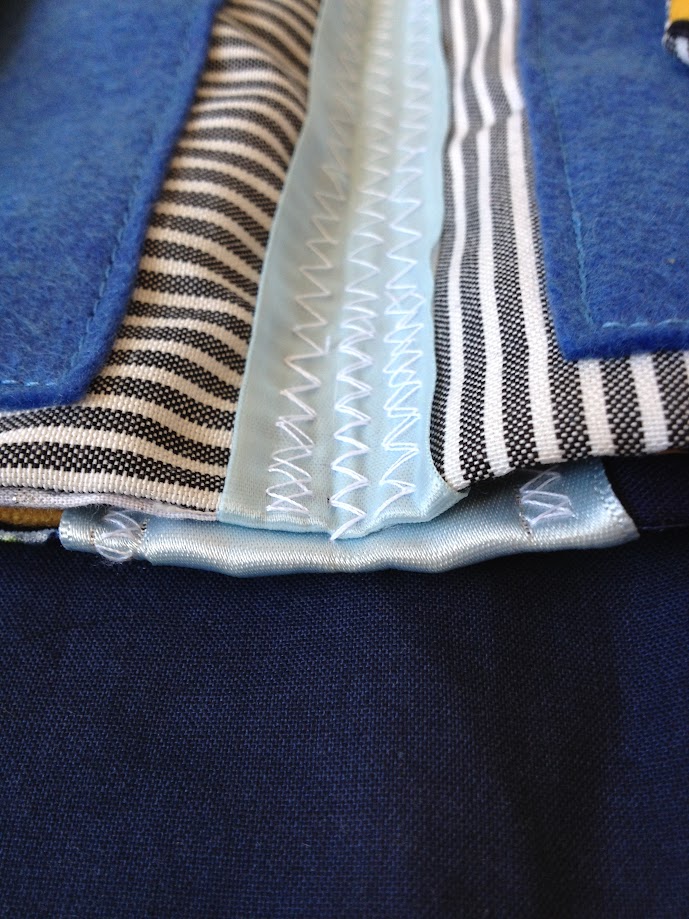
Carissa D: Which ways are you thinking about using to bind your felt book and do you have plans for any more pages?

Mischa: No.

Mischa's Mum: Nup, it's finished is it?

Mischa: Yep.

Mischa's Mum: And how did you want to join it together? (This was before we joined it). Do you like the way we joined it, or would you think another way might be better?

Mischa: I thought another way might be better.

Mischa's Mum: Oh, what way did you think to join it would be good?

Mischa: Well, like we don't have the right wire around through the button holes.

Mischa's Mum: Put wire around through the holes? Oh yeah, do you like the rings on the other ones, or just wire?

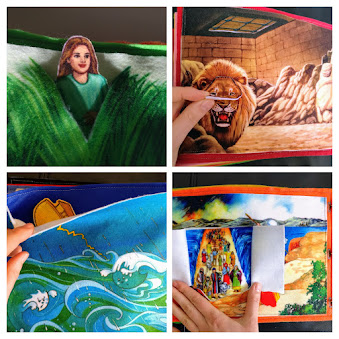
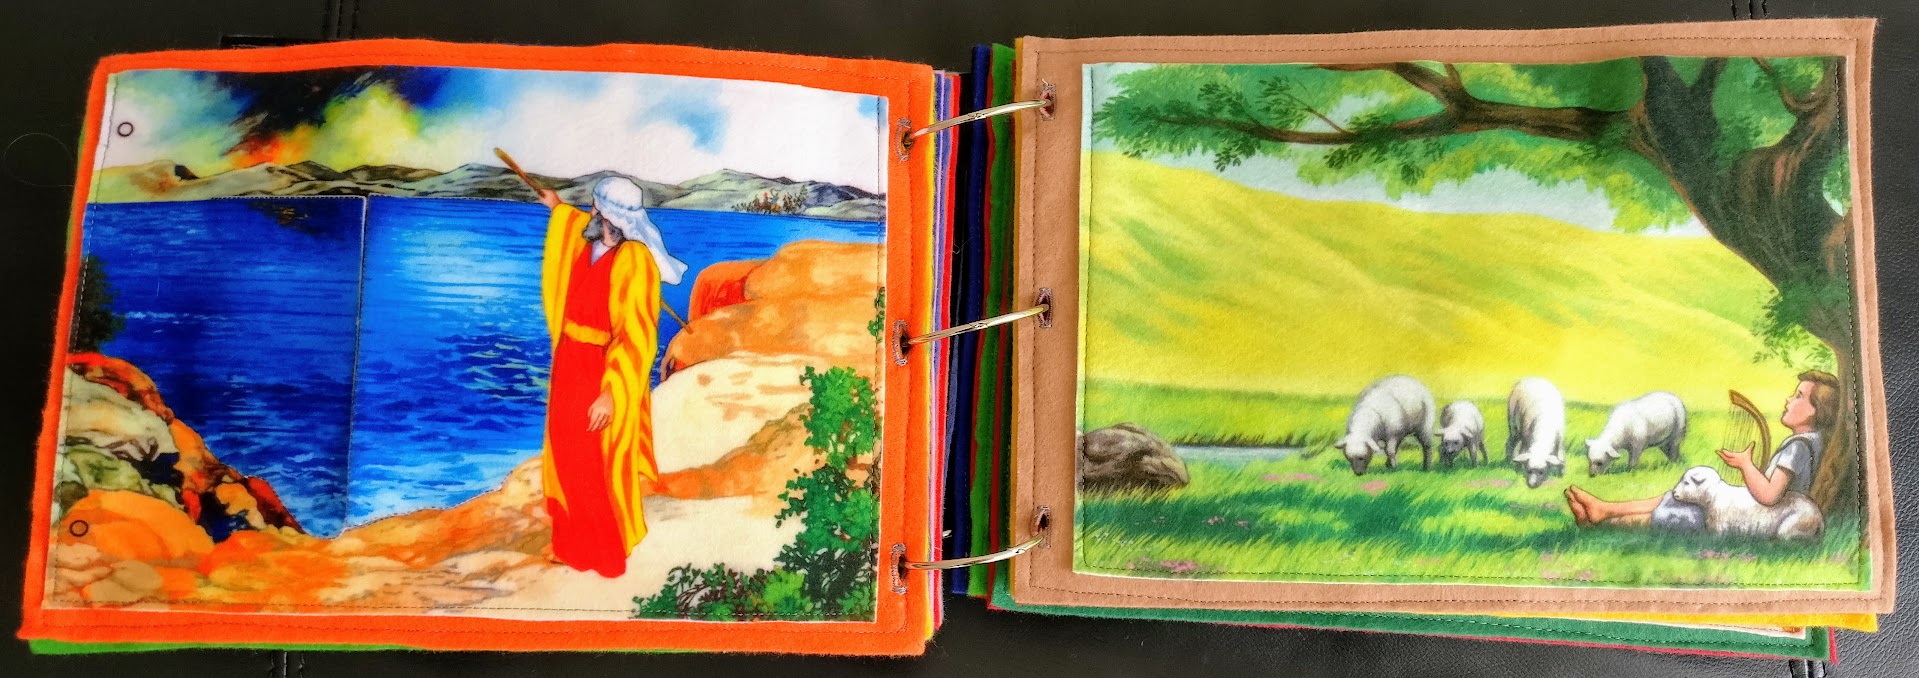
The "other ones" are the two books made for her sister Vashti and herself by my sister and I (and some friends in some cases). You can see some of the pages at Vashti's Quiet Book - Front Cover and Crown PagesVashti's Quiet Book - My Sister's Pages, (I haven't posted anything on Mischa's one yet) and an example of how I bound them in my post How To Ring Bind Felt Quiet Books - Free A4 Buttonhole Guide.


Mischa: I just like the rings on the other ones. 

Mischa's Mum: So you did want it to have rings on it?

Mischa: Yeah, but it's too late now, isn't it.

Mischa's Mum: Oh no, you could still put rings in them. Instead of the - just take the ribbon out and put rings in, couldn't you? 

Mischa: Yeah, but it doesn't really matter. 

But of course I have given her some rings so she can change it over.

Carissa D: Thanks so much for sharing your adorable felt book with us Mischa. I look forward to seeing your next creation.

My sister tells me Mischa has said that next she would like to make a dressing gown for toys - an actual one, not a felt page.


Follow Faith and Felt Obsession on FacebookPinterest and You Tube

Do you know a little friend who has decided to make their own quiet book? Ain't they the sweetest!

Thursday 2 December 2021

Vintage Counting Book

I spied this book from a few pews back in a little church I visited while on holidays a couple of years ago. After the service finished I went and spoke to the lady who owned it, who graciously allowed me to photograph it to share with you all. As you can see, I took the photos right there on the pew.


I was informed that this busy book was around 30 years old. I find it fascinating how quiet books have developed through time, and love to see the classic pages show up so often in the past, and then see the myriad of pages around today.


The page for number 1 is a bird in a birdhouse which is attached to a string to stop it from being lost.


I took a close-up of the inside cover. It looks like the book may have been made from a kit of some kind, titled "Counting Book" by WV Designs. I looked them up but didn't find anything relevant. If know any information, please let me know if the comments.


For a little history on quiet books and the classic pages, you can read my post The Evolution of Quiet Books.


Page 2 is a clown face with what I think is two ears to button on, as well as a bell and ribbon to tie.

Page 3 is ice-cream scoops, although one has been lost over the years.


Page 4 is a turtle with a zipper back for baby turtles to be stored. It looks like a few of them are missing too.

Page 5 is an elephant holding five balloons.


Page 6 has six button-up flowers.

Page 7 is a Noah's ark with seven animals inside.


Page 8 is a fishing net with eight fish inside.

Page 9 has nine shapes to match.


I imagine Page 10 originally had ten kids praying. I have been wondering what the heck the other page was, but I actually think I worked it out...

I think it is a bed and a mat that the kids can kneel on so they can say their prayers before bed.


Finally, I thought I would show you how the book has been bound. It has a strip of ribbon sewn down the spine with gaps to allow split rings to rest in place to house the back-to-back sewn pages with inserted grommets.


Tahlia - Telling It on The Mountain


I hope you enjoyed this trip down memory lane.


Follow Faith and Felt Obsession on FacebookPinterest and You Tube

Which is your favourite page in this vintage counting book? Comment below!

Thursday 9 September 2021

Quiet Book Experiments - Epic Fails

Today, I want to share some of my Epic Fails with you. Making busy books can be a bit of an experiment, and sometimes the experiment fails. Anyway, I hope it will be an encouragement to know that we all make mistakes. A blog is generally full of all the good things, and usually the mistakes don't make it here. In fact, it is easy to hide mistakes by careful photography, and I have been guilty of that as you can see below if you are a Faith and Felt Obsession fan.

Epic Fails may make a comeback in future posts, but for now, here are the first 5 that I am willing to share!

1. Hot Glue Gun Epic Fail


Whilst this page remains one of Tahlia's favourites, I still count it as a fail. I was trying to cheat and make a quick and easy page with hot glue and a few old lids from baby wipe packets. The hot glue has not worked very well and the page threatens to fall apart every time we use it. But the idea is LOVED. You have to guess which door the pig is hidden behind. One person looks away while the other person hides the pig. Loads of fun to a child. I may have to make a better version out of felt some day, but for now, this will do until it finally does FAIL completely.

2. Speckled Felt - for Speckled Eggs Epic Fail


This was my attempt to make felt with a bit more character. In Australia there are not many options when it comes to buying patterned felt. Of course there are more options if you buy online, but I still don't see the options I have seen available in the U.S.

I wanted to make speckled eggs for a hen quiet book page I was making (will link to it once published). Now my felt just smells like bleach and did not turn out speckled at all. Thanks to Murphy's Law the bleach did not work when I wanted it to, but no doubt it would work very well if I spilled bleach accidentally on a finished page.

I tried using a spray gun to apply the bleach and left it overnight. That didn't work, so I tried wetting the felt first so it would soak into the felt better instead of sitting more on top. I dabbed it on in larger spots. That also didn't work. So I ended up with no change in colour, but a definite change in smell. I wanted speckled fresh eggs and ended up with a FELT FAIL that smelled more like century eggs!

3.  Quiet Book Binding Epic Fail


I like a good finish, but I am willing to cut as many corners as I can to get there. I had seen Irina Sorokina's YouTube tutorial on how to bind a quiet book, but I was still feeling intimidated and overwhelmed. But I liked the finish so started thinking about how I could cut a few of those daunting corners off. Pun intended.

I decided that I could get a similar look by sandwiching the pages and wadding between a folded ribbon and sewing that down. You can see my efforts in my blog posts Easy Peasy Pocket Page 8"x8" Material Quiet BookPuzzle Quiet Book Page Swap, and Post Binding Quiet Book Closure.

You may notice that I didn't post many pictures of the completed book. That is because I didn't want to show off my epic fail. I didn't allow enough ribbon in the spine for the book to open properly, so when it lays flat, the pages overlap instead of laying alongside each other.

Honestly, I still find the traditional binding method daunting. And that is why I keep trying to share alternatives with you all. Why not give some of them a go:
4. Buying a Heat Press Epic Fail


As I spoke about in my Sublimation Printing on Felt - Test post, I finally got around to purchasing a heat press so I can transfer sublimation prints onto felt. Actually this was the second one I bought. The first purchase was an EPIC FAIL too. I first bought one from AliExpress, where I buy a lot of craft supplies such as buttons, beads and ribbon. Apparently the postage was too great and then there were taxes etc - the supplier kept asking for more money. After expressing my dis-satisfaction they agreed to refund the purchase and gave my money back, thankfully.

My second purchase was from e-Bay. It was not much more expensive than the Ali-Express one and was coming from a company based in Australia, so it would be easier for me to make arrangements if there were any issues. It also included delivery. I thought I was doing great this time, but when it arrived I found more problems...

I stared at the box for months. It looked complicated to put together and I didn't have the mental energy to approach it. I was scared. Then when I finally opened the box... I found it was already put together and I only had to change it if I wanted a different attachment. But, it was too heavy for me to lift!! Now I felt I would have to nag my husband to move it for me if I want to use it 😁.

After he did lift it out for me, I have discovered I can move it from one place to another, so ling as it is already at bench height. So it is now in my garage on a shelf and I can get it out onto a bench if I want and put it away. although I am still yet to order any sublimation printed paper from Digitextiles as planned and am now considering getting a sublimation printer too so that I will actually use the heat press... watch this space.

5. Sewing Pleather to Felt Epic Fail


Okay, so this one is rather embarrassing. 

I completely massacred this death mask. I guess that's a little ironic. At least it makes for a good Epic Fail post. I hope you can see all the tiny stitches from the pleather not feeding through my sewing machine properly, and all the skipped stitches which resulted in me going over the same area several times in an attempt to save it.

Stretchy pleather is a nightmare to sew. That is all.

I was able to do an acceptable job by using glue to secure the pleather to the felt prior to sewing, which helped a lot. You can see the results in my Genesis 50 - Joseph's Bones Quiet Book Page post.

I'm thinking I might buy some glitter felt for the next gold project...


Ultimately, if you don't give it a go, you won't give yourself the chance to learn and improve.
Epic Fails can teach you a lot!


Follow Faith and Felt Obsession on FacebookPinterest and You Tube

Have you had any Epic Fails? Comment Below!

Thursday 23 May 2019

Hand Stitched Quiet Book Cover

I recently saw a hand-stitched quiet book cover which someone had made their grand-daughter. It was so lovely, I had to share it with you all.


I think you will agree, the design is very simple, but it looks stunning.

The pages are made from one or two of the Betty Lukens quiet book kits (not an affiliate link) which I have featured before in several posts:


This time however, the instructions for gluing pockets on the reverse of the pages has been followed.

When the book is put together this means that all pages are stacked on top of each other facing up and then bound. The original instructions ask you to hole punch the felt and run string through the stack, but this book has been bound very wisely ignoring that portion of the instructions!


Instead, it looks like the stack has been hand stitched together first and then the tightly fitting hand stitched cover has been attached to the stack. This allows decorative stitching to be used on the outside and solid-hold stitching to be used on the spine underneath.

My other posts on how to bind quiet books include:


Follow Faith and Felt Obsession on FacebookPinterest and You Tube

Which binding method appeals to you most?

Tuesday 10 July 2018

How To Ring Bind Felt Quiet Books - Free A4 Buttonhole Guide

One of the reasons I chose to use felt pages my quiet books was because they are so simple to sew together.


I sew my Bible Quiet Book Project pages back to back and insert a ribbon tag to use to thread rings through. This allows me to completely disassemble my pages if anything requires fixing.

When I am making a book for someone else however, I usually use buttonholes instead. Threading the rings through buttonholes seems to keep the book more sturdy and keeps the pages lined up better. The rings pictured below are 50mm Album Rings from Daiso. You can get smaller rings, sometimes called split rings or hinged rings from places like Spotlight in the scrapbooking section, and sometimes in office supply stores.


In case you would like to follow the buttonhole binding method, I have uploaded a free A4 Buttonhole Guide to make lining up your buttonhole quick and easy. You will need to print it out and copy the hole spaces onto card stock and cut them out. Use this as a template to mark where you want your buttonholes to go. I did mine in pen, but it is best to use chalk or fade-able pen so there is no chance you will see the marks later.

My sewing machine has a one-step buttonhole setting, and I used a female Kam Snap as the button at the back of the buttonhole foot to get the correct sized buttonhole for this guide.


Thanks to my friend who allowed me to use her Betty Lukens felt activity book kit as an experiment! Have a good look at the next lot of page spreads to see if you notice what my experiment was:


You may have to click on the photos to make them big enough to notice. Post your guesses in the comments below! 
Follow Faith and Felt Obsession on FacebookPinterest and You Tube

The quiet book owner having a Michelangelo moment with St Peter


Follow Faith and Felt Obsession on FacebookPinterest and You Tube

How do you prefer to bind your quiet books?

Sunday 8 October 2017

Ribbon Quiet Book Binding Method

The Ribbon Quiet Book Binding Method is a very simple way to put a quiet book together if you want the book to be completely bound. By 'completely bound' I mean that you cannot swap the pages in and out. It is a completely bound book and will stay that way.


The pillowcase closure has been pulled back underneath so you can see the layers side on.


Explanation Video


This is a method I came up with after trying Debbie's tutorial of How To make Cloth Books from her website Cloth Books for Baby. I tried her method on my Up-cycled Clothes Quiet Book, and while it was super simple, I found that the spine was rather thick and difficult to sew. It didn't help that I sewed some of the clothes right to the edge of my borders, but I guess that is what you get when you make a quiet book. Very thick pages.


So to combat this issue, I tweaked Debbie's idea slightly and came up with the Ribbon Quiet Book Binding Method.

I must warn you, I put this quiet book together very late, actually very early, on Christmas morning last year. It came together quite quickly, considering. If I was using the traditional quilted quiet book binding method, I am certain I could not have finished in time.


I think I may have already attached my Pillowcase Quiet Book Closure to the back cover before that night, but I can't quite remember. Let's assume that I had!


Most of the pages were made by people in a swap that I went in, so I can't take any credit for those. Aside from the cover, the pages I did made for this book were for a Felt Board in a Fabric Quiet Book, and a pocket page to store the felt board pieces and random pieces from other pages. I wanted the pocket to be easily accessible from the felt board pages as it is not constructive to play to be having to turn the page to get to a pocket, especially when there is nothing attaching the pieces, and they would likely fall off and have to be re-positioned.


View of the book folded out with the cover and closure showing.

I positioned the pages in the order I wanted them to appear once put together, then sewed the pages on two or three sides (depending on how many ribbon spines or joiners were to be attached to them) with right sides together. Then I turned them so right sides were facing out before attaching ribbons to form spines or joiners between the pages.


This reduced the bulkiness along the seams, and meant that the pages could be stacked together and sewn down the middle to form a spine so much easier than with my attempt for the Up-cycled Clothes Quiet Book.


Mum was horrified that I didn't top stitch the pages once I turned them, and is worried that they will fray, especially if I need to wash it. I guess I am just lazy, and I will hand wash it anyway if I need to so I think it will be OK. The zigzag stitch should help with that too.


View of the ribbon joiner attached at the seam where the pillowcase closure is attached.


The book can be folded innumerable ways so that any page can be sitting on top.


Follow Faith and Felt Obsession on FacebookPinterest and You Tube

Let me know if you try my ribbon quiet book binding method!