Showing posts with label material quiet book. Show all posts

Thursday 21 April 2022

Easy Peasy Tea Party Printed Quiet Book Page

This easy peasy quiet book page comes with a little disclaimer. I used a regular printer and fed some Korean hard felt through it rather than paper. I printed around ten pages worth, and they all printed fine. Not long after doing this however, my printer would no longer print correctly, and I had to get another one. 


It is certainly better if you can use the sublimation printing method to print on felt instead! See my post Sublimation Printing on Felt - Test. The colours would turn out much better too, no doubt. Although I think it is okay anyway, especially for a page like this. My Mum says it makes it look antique.


What little girl doesn't enjoy a tea party? I certainly enjoyed many on a cot blanket (think pretend picnic blanket) with my sister and all our dolls and teddies. This little girl has a puppy and kitty to spoil, and they are all totally adorable.


I found this ‘Little Miss Alice & Her Dolly – a commercial Paper doll book’ vintage paper doll set on Pinterest - and there you can find many others as well. I have saved quite a few that might work well for quiet books to my board Felt Sublimation and Printables, which needs a bit of re-organising. The link to the Marges8's Blog posts where you can find the image is here.


Tahlia demonstrates how to mess up a quiet book for a gift

I simply cut slits where indicated for the puppy and kitten to sit at the table and sewed around the outside edge of the felt section depicting the table, leaving the top open to form a pocket to store the dolly, puppy and kitten.

Finished!


Follow Faith and Felt Obsession on FacebookPinterest and You Tube

Have you made something similar yourself? Let me know how it went. And which background do you like best for the vintage dolly tea-party?

Thursday 7 October 2021

5 Ways to Measure and Cut Quiet Book Pages

Which is the best way to measure and cut fabric for quiet books is a common question people ask when they are thinking of starting to sew a quiet book for the first time. I have compiled a few examples below so you can choose the method that suits you best.


Of course, for all the methods, it is best to wash and iron the fabric before cutting to ensure it doesn't shrink afterwards.


1 - Fold and Cut

Simply fold your material into squares (or rectangles depending on the size book you want to create) and cut along all folds. This works well for when you want to use the same fabric for all the pages of your busy book. If you want different fabric for each page, another method will suit you better.


2 - Template Drawing

This is the method I use. I have decided on the sizes I want to use a lot and have made templates out of some cardboard I had laying around. Then depending on how precise I want to be, or how slippery the fabric is, I simply place it on my fabric and either cut around it, or draw on the fabric and then cut using plain old scissors.

You can just use a kid's picture book to get the sizing right too. If you look at the age recommendation on the book, it will give you an idea of what a good page size for that age looks like. Just remember to cut extra for the hem.


3 - Quilting Ruler and Rotary Cutter

If you want to do a lot of fabric cutting, you may want to invest in some tools. This method is easier on the hands if you are finding you get strains, or you have arthritis or such.


4 - Clip and Rip

This method ensures that your fabric is cut straight along the grain, and is rather quick. You may not get as many squares out of your fabric as you thought though. The video demonstrates how to make strips, but you can definitely cut the other sides of the squares in the same way.


5 - Laser Cutting Machine

This last method is of course very expensive and is therefore suited to large scale production, which I am guessing most of my readers are not going to be into. But I know you are all going to be drooling in wishful thinking like I am! Of course, this is an example of the detailed cuts which can be done, but you can also cut plain boring background pages this way too.


Which method suits your needs best? Have I missed a method? I'd love to hear about it.


Follow Faith and Felt Obsession on FacebookPinterest and You Tube

How do you cut your pages? Comment below!

Saturday 1 September 2018

The Evolution of Quiet Books

While it may at first appear that there is not a lot of readily available information about the history and development of quiet books, I have been able to find some quite interesting details regarding their evolution.

Firstly I would like to draw your attention to a very informative article The History of the Bendable, Durable, Chewable Board Book by Olivia Campbell on the LIT HUB website. She talks about the results of technology development and the financial access it brought to books and toys as well as a dramatic paradigm shift that occurred in relation to children and books in general. It is an interesting read.


Image Source


In 1902, Dean's Rag Books Company was formed, publishing the first printed cloth books. They had pinking sheared edges and were advertised as being indestructible. Unlike paper books, the pages could not be torn and/or eaten by children and they could be washed, sterilized, and slept with comfortably. The company went on to produce printed panels which could be sewn into a book by the purchaser. They extended this idea to their traditional book range and made cut out model books out of card which buyers could put together themselves. See The Brighton Toy and Model Index for more details on Dean's Rag Books Company or the book on it's history pictured above.

Dean's Rag Book Company was an offshoot of the Dean & Son book publishing company founded not long before 1800. The University Libraries website credits them with publishing the first movable books, including pop-up books, pull-tab books, and pantomime toy books. Dean's Rag Books Company does not seem to have incorporated these ideas into their cloth books.


Image Source


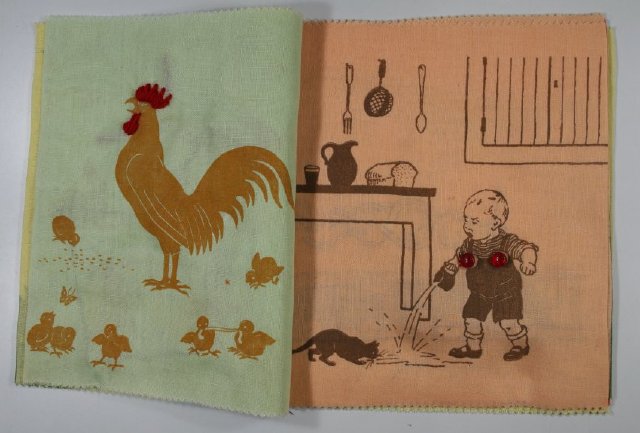
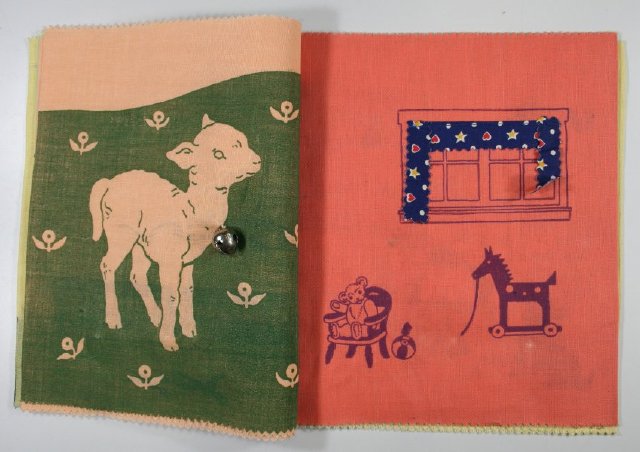
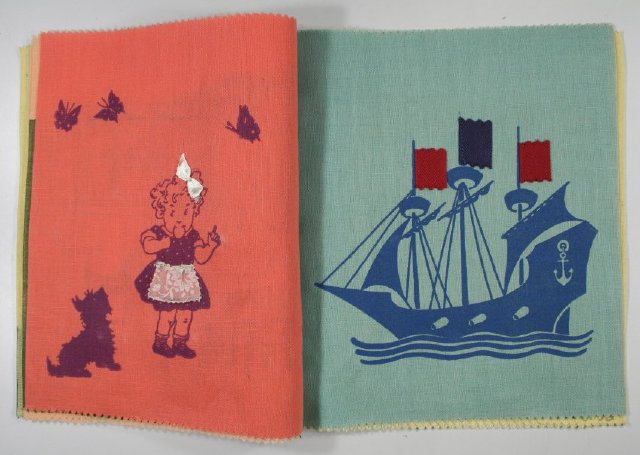
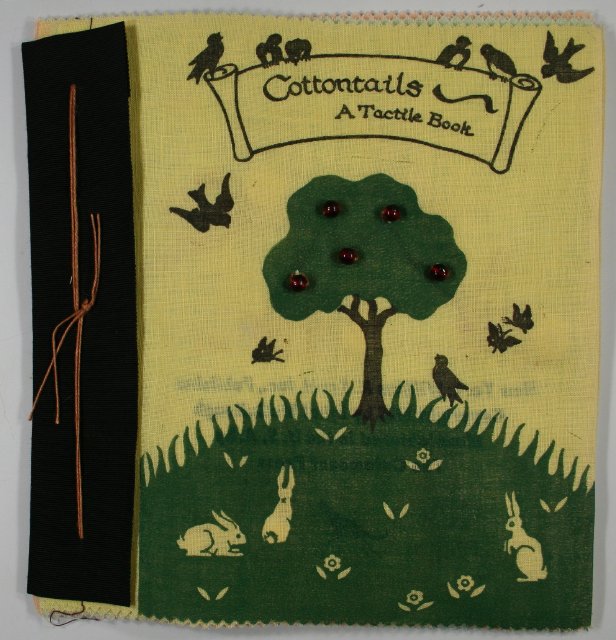
One of the earliest tactile books published may have been "Cottontails - A Tactile Book" dated to 1938, a copy of which is preserved in the Bennington Museum. As you can see, it features tied binding, beads, pom-poms, buttons, fabric, ribbon, a bell, and what appears to be felt.


Image Source


Image Source


Image Source


Image Source


Image Source


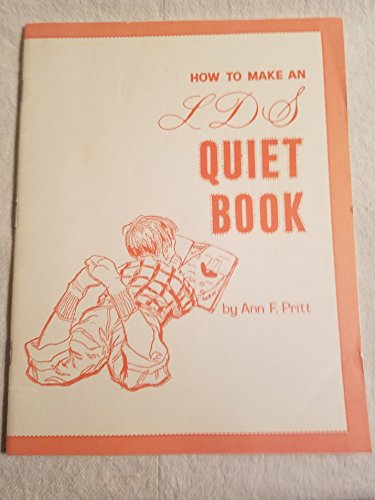
The earliest dated quiet book pattern I am aware of is by Ann F Pritt, copyrighted in 1967 to Deseret Book Company. She made a Mormon version because she noticed a lot of mothers bringing quiet books to church and wanted to promote a focus on scripture. You can download her pattern for free from The Idea Door website: How to Make an LDS Quiet Book by Ann F. Pritt


Image Source


Thanks to a lovely friend, I own a copy of  How to Sew A Quiet Book from Craft Course Publishers, copyright 1977. It is Craft Course SP-11 and says it was adapted from a book submission by Annelle Simmons. Many of the classic quiet book pages are included in her patterns and it is my guess that they were already established as classics before this publishing.


Image Source


In addition to the try my mitten and football lacing pages featured on the front cover, pages include pockets for a pad and pencil/crayons, flower buttoning, hair braiding, clothes on a washing line, a clock, a train, balloon colour matching, shape matching, 1-10 bead counting, bow tying on a kitten, a clown face to rearrange, and a zippered ladybug with babies.


Follow Faith and Felt Obsession on FacebookPinterest and You Tube

If you know of any earlier patterns or other information, I'd love to hear from you!

Monday 7 May 2018

An Interview With Brenda Dent - Devotions Through Play Quiet Book

Today I would like to introduce you to Brenda Dent and her Devotions Through Play quiet books. I saw how she was able to include a printed Bible verse in her books and just HAD to invite her to share her method with you though an Interview on Faith and Felt Obsession. Brenda operates the Creative Seamstress Shop in Tacoma, WA.


Devotions Through Play Quiet Book Video


Carissa D: How did you get interested in making quiet books?

Brenda: Got interested in Quiet Book sewing because they are colorful and entertaining even for me. Is a great distraction from nursing and I am in midst of retiring in 2-3 years. Thinking about starting a sewing business. Just something to do when retire from, as of now, 48 years of nursing. Love being imaginative and sewing since age 11. Altering my own clothes was essential due to then, my large size. And then had a little sister who laid on floor (sucking her fingers) asking me to make her a dress. I instead made her pajamas. Her pajamas were made by laying fabric on the floor, spreading arms out, like an angel, cutting around her. Then sewing the seams, elastic around neck and wrists, and hem. Well, she loved them, and made these requests every time I opened the sewing machine. My mom noted the talent and began buying patterns, sewing by their instructions and making dresses for rest of sisters and me. I did take a class in Home Economics, but did not ace the class because I had already developed techniques that were not favorable to my teacher.


Carissa D: I love your story about how you learned to sew by making things for your little sister :) does she sew too?

Brenda: Haha. No my sister does not sew.


Carissa D: What inspired this particular quiet book?

Brenda: I became inspired to sew a "Lutheran Quiet Book" because noted little resources for "Lutheran " version of a quiet book. I began making them for new babies in my church after baptism. I also sold them at a local store who sold local home made items. I then changed the name to "Devotions Through Play". They sold like 'hot cakes'.


Carissa D: Where did you get your ideas and did you use any templates?

Brenda: Ideas originally came from templates but refashioned them to the Lutheran teachings. Being a Sunday School teacher, in my high school and college years, promoted the idea of attaching God's word while a child plays.

I think that is why this quiet book stands out because it is learning His Word through play; Reading bible references/stories, hymns, and excerpts from the Lutheran Catechism. Promotes parent and child to spend time together, inspire child to learn, and remind parent of The Word of God.


Carissa D: I am totally loving the method you came up with for adding the written Bible verses to your pages. Could you please explain to everyone how to do this?

Brenda: I transfer bible verses to 'Light' Fabric transfers by AVERY. Just follow directions. Then I Iron the transfer on to a light cloth,I use muslin, then sew on to the page.


Carissa D: What encouragement can you give to anyone wanting to make a quiet book for someone special in their lives?

Brenda: This activity book is great for any ladies church group, where each person can sew a pattern or activity and one other can design a cover. Less work and time. Then all bring pages and place in the cover and present to a new parents of a child who has been baptized. This book is geared for 18 months to 3 years, so you have plenty of time for production. These pages do not necessarily require sewing, activity page can be done with painting and pasting. There are plenty of templates out there for free for references.


Carissa D: Feel free to give your business a plug!

Brenda: Please visit astitchintimecreations.biz. My business is thriving called Creative Seamstress Shop. I mend, sew, tailor, and create custom requests; jean bags out of a father's old jeans for a couple of sisters after his death, activity blankets/aprons for people with Alzheimer's, and make angel gowns for infant deaths to support families during grieving. These gowns/cocoons are donated to hospitals or given to those who request them.


Thank you so much for sharing with us Brenda! I love that you were able to find an easy way to include writing in your quiet books. It is often quite a difficult thing to do without an embroidery machine, which many of us do not own. But you have solved the problem. Well done!


Here is one of Brenda's activity aprons for Alzheimer patients. They are much like a quiet book or a fidget quilt to help exercise the minds of our dear oldies, but aprons are a little more practical as they cannot get lost. Terrific idea.


Follow Faith and Felt Obsession on FacebookPinterest and You Tube


If you have any more ideas on how to write neatly in quiet books please share in the comments!

Sunday 8 October 2017

Ribbon Quiet Book Binding Method

The Ribbon Quiet Book Binding Method is a very simple way to put a quiet book together if you want the book to be completely bound. By 'completely bound' I mean that you cannot swap the pages in and out. It is a completely bound book and will stay that way.


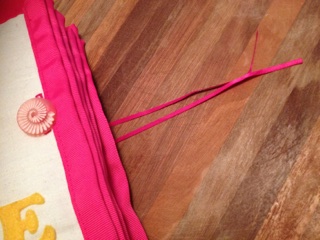
The pillowcase closure has been pulled back underneath so you can see the layers side on.


Explanation Video


This is a method I came up with after trying Debbie's tutorial of How To make Cloth Books from her website Cloth Books for Baby. I tried her method on my Up-cycled Clothes Quiet Book, and while it was super simple, I found that the spine was rather thick and difficult to sew. It didn't help that I sewed some of the clothes right to the edge of my borders, but I guess that is what you get when you make a quiet book. Very thick pages.


So to combat this issue, I tweaked Debbie's idea slightly and came up with the Ribbon Quiet Book Binding Method.

I must warn you, I put this quiet book together very late, actually very early, on Christmas morning last year. It came together quite quickly, considering. If I was using the traditional quilted quiet book binding method, I am certain I could not have finished in time.


I think I may have already attached my Pillowcase Quiet Book Closure to the back cover before that night, but I can't quite remember. Let's assume that I had!


Most of the pages were made by people in a swap that I went in, so I can't take any credit for those. Aside from the cover, the pages I did made for this book were for a Felt Board in a Fabric Quiet Book, and a pocket page to store the felt board pieces and random pieces from other pages. I wanted the pocket to be easily accessible from the felt board pages as it is not constructive to play to be having to turn the page to get to a pocket, especially when there is nothing attaching the pieces, and they would likely fall off and have to be re-positioned.


View of the book folded out with the cover and closure showing.

I positioned the pages in the order I wanted them to appear once put together, then sewed the pages on two or three sides (depending on how many ribbon spines or joiners were to be attached to them) with right sides together. Then I turned them so right sides were facing out before attaching ribbons to form spines or joiners between the pages.


This reduced the bulkiness along the seams, and meant that the pages could be stacked together and sewn down the middle to form a spine so much easier than with my attempt for the Up-cycled Clothes Quiet Book.


Mum was horrified that I didn't top stitch the pages once I turned them, and is worried that they will fray, especially if I need to wash it. I guess I am just lazy, and I will hand wash it anyway if I need to so I think it will be OK. The zigzag stitch should help with that too.


View of the ribbon joiner attached at the seam where the pillowcase closure is attached.


The book can be folded innumerable ways so that any page can be sitting on top.


Follow Faith and Felt Obsession on FacebookPinterest and You Tube

Let me know if you try my ribbon quiet book binding method!

Sunday 14 May 2017

Felt Board in a Fabric Quiet Book

Last year I went in another quiet book swap. This one was outer space themed, and since I had previously bought a space themed felt board play set, I wanted to include it in the book.


The pages of the book are fabric. Adding felt pages would have posed a problem when putting the book together. Felt is rather thick and would have made turning the pages right side out difficult. So this was my solution: I simply cut felt squares slightly smaller than the page and sewed them onto it, allowing room for a fabric border and the seam allowance.


Since I wanted a larger amount of room for the felt board set than one page allowed, I repeated the process on another page. This created another problem of how to store the felt board set pieces in a pocket without creating a large bump behind the felt board. Also, I wanted to be able to access the pocket without turning the page and having all the pieces fall off whilst playing with it. I solved this problem, but it needed it's own post to explain, so stay tuned!


I used a striped fabric for the felt board pages, and I purposely laid the stripes in opposite directions on the border. I think it looks good that way. A plain felt page would have looked rather boring if I had not included enough space between the felt and seam allowance for a border. I don't think the border puts a border on the imagination. At least I hope it doesn't. I probably would not have liked it as a child. I was a very fussy child and liked everything to be as close to real as possible. Happily, Tahlia does not seem to share my quips about toys and realism.


Follow Faith and Felt Obsession on FacebookPinterest and You Tube

Do you think the felt board in a fabric quiet book works?

Sunday 30 April 2017

Pillowcase Quiet Book Closure

I am always trying to think of imaginative ways to keep a quiet book closed that don't take a lot of effort to sew. If it also helps to keep stray pieces inside it's a big bonus. So here is my next quiet book closure idea which I have named the "Pillowcase"!


It is easy to see that I got the idea from a pillowcase... I made a flap on the back page from rib knit fabric which folds over to enclose the pages and front cover and helps to keep small pieces from falling out (Heaven forbid). I used a folded piece of rib knit so that there would be no need for a seam along the turning edge that might impede the ability to fold it over (and might look unattractive). I did put a pin tuck close to either corner, but I don't think I would recommend it. Since the rib fabric was already doubled it made it rather hard to sew due to it's thickness, and because rib knit is stretchy and the whole reason I used it, I'm pretty sure it wouldn't be necessary. Although if your quiet book is very thick, maybe it would be an idea to try. It might work better if you put a separate pin tuck slightly over from each other in the top and bottom layers of the rib knit fabric instead of pin tucking the two layers together like I did - who knows why.


This method is really easy for kids to open. That may be a positive or negative depending on the children you are designing a quiet book for! I don't like Tahlia to play with them without my supervision yet, so I store them out of reach.


I like the look of it and it saved me from having to do any decoration on the front cover. You could easily put the flap on the front cover instead so it folds over the back if you preferred.


Follow Faith and Felt Obsession on FacebookPinterest and You Tube

How do you like the pillowcase closure idea?

Sunday 27 March 2016

Post Binding Quiet Book Closure

Normally you would put a closure on a book before you finish binding and doing your cover... But I couldn't decide whether/how I was going to do it and kept going anyway. They say necessity is the mother of invention, so here is my solution:


As I was pondering how I was going to make a closure for my finished book without making it look terrible with stitching showing all over it, I came across these display cuff-links.


They inspired this closure idea for when you have already bound your quiet book, but find that you really do need to be able to close it and don't want to waste your energy re-sewing the cover.


Materials Needed to create a Post Binding Quiet Book Closure:

  • Two large buttons
  • short piece of ribbon or elastic
  • thread
  • sewing machine with buttonhole function
  • one tiny button if using a one step buttonhole function

If using a one step buttonhole function, first do a practice buttonhole for both your small and large buttons. That way you can work out the length and center your buttonholes along the edge you want to put the closure on. Make large buttonholes along every page edge except the last, where you will make a very small buttonhole. This will ensure that the buttons and ribbon cannot fall out and get lost. 


Remember to change buttons in the measurement end of your one step buttonhole foot at the appropriate times! Also, I found that the button would often pop out of the foot when I removed each page because they were fairly thick. Watch out for that, or your buttonholes will get progressively smaller.

Instructions for how to use a one step buttonhole function can be found towards the end of my Easy Peasy Lei Flower Quiet Book Page.


Use a seam-ripper to open up the buttonholes. I sewed the buttonhole on this counting page twice since I would be cutting through a ribbon on the page.


Thread the ribbon through the button that you want showing on the top.


Then thread both ends of the ribbon through all of the buttonholes. Turn the book over and thread on the second button.


Tie a knot in the ribbon, then do a double-knotted bow so it can't come undone.


Done!


Here is Tahlia keeping herself busy barricading the kitchen while I was book binding.


Follow Faith and Felt Obsession on FacebookPinterest and You Tube

Has this solved your problem of how to add a closure after you have already bound your quiet book? Comment below!