Sunday 27 March 2016

Post Binding Quiet Book Closure

Normally you would put a closure on a book before you finish binding and doing your cover... But I couldn't decide whether/how I was going to do it and kept going anyway. They say necessity is the mother of invention, so here is my solution:


As I was pondering how I was going to make a closure for my finished book without making it look terrible with stitching showing all over it, I came across these display cuff-links.


They inspired this closure idea for when you have already bound your quiet book, but find that you really do need to be able to close it and don't want to waste your energy re-sewing the cover.


Materials Needed to create a Post Binding Quiet Book Closure:

  • Two large buttons
  • short piece of ribbon or elastic
  • thread
  • sewing machine with buttonhole function
  • one tiny button if using a one step buttonhole function

If using a one step buttonhole function, first do a practice buttonhole for both your small and large buttons. That way you can work out the length and center your buttonholes along the edge you want to put the closure on. Make large buttonholes along every page edge except the last, where you will make a very small buttonhole. This will ensure that the buttons and ribbon cannot fall out and get lost. 


Remember to change buttons in the measurement end of your one step buttonhole foot at the appropriate times! Also, I found that the button would often pop out of the foot when I removed each page because they were fairly thick. Watch out for that, or your buttonholes will get progressively smaller.

Instructions for how to use a one step buttonhole function can be found towards the end of my Easy Peasy Lei Flower Quiet Book Page.


Use a seam-ripper to open up the buttonholes. I sewed the buttonhole on this counting page twice since I would be cutting through a ribbon on the page.


Thread the ribbon through the button that you want showing on the top.


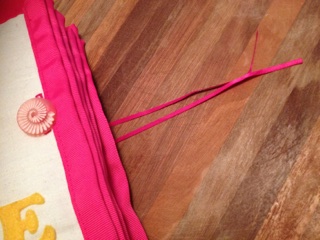
Then thread both ends of the ribbon through all of the buttonholes. Turn the book over and thread on the second button.


Tie a knot in the ribbon, then do a double-knotted bow so it can't come undone.


Done!


Here is Tahlia keeping herself busy barricading the kitchen while I was book binding.


Follow Faith and Felt Obsession on FacebookPinterest and You Tube

Has this solved your problem of how to add a closure after you have already bound your quiet book? Comment below!

Thursday 17 March 2016

Puzzle Quiet Book Page Swap

I recently went in a quiet book swap with a group on Facebook.


We each made seven copies of our own page and sent them to the host. She sent us back one of our own pages, and six different pages made by the other participants. It is a great way to build a quiet book. You only have to think about one page layout so it saves on supplies and effort.

With not a lot of time before Christmas, this was meant to be a quick and easy basic swap.  The theme was puzzles, and the size of the pages was reduced to 8"x8", which makes it an ideal book for occupying the little ones while travelling.

This is the page I contributed:


It is a themed button maze - there are a couple of mobs of sheep in a bunch of paddocks. The gates can be opened and shut, and the sheep can be fed on a lush pasture of clover or a pile of hay, and you can bark at them while you do it all - whatever your imagination can muster.

I drew out where I wanted fences on a piece of paper so I could organize the paddock layout in my head. After sewing the buttons under a piece of tulle, I laid strips of rik rak down for the fences and sewed them down, leaving it open where the gates were to go. Cut the rik rak where the gates go and melt the ends with a match to stop it unraveling.

Done!


One of the other pages contributed was an entirely hand sewn Little Bo Peep - now that is dedication! One sheep is detatchable with velcro, and you can trace over the different paths to find which one leads home.


Our swap host made a cupcake puzzle and pocket. The pocket was made by laying two pieces of fabric over each other, turning the top edge of the top one down and adding a piece of velco to each respective side, then stitching around the three edges of the top layer of fabric - I loved the idea because it was really easy!


There were three tangram pages done in this swap. They were all made with an embroidery machine. This first one is of a rabbit. The theme went great with this bunny material I had, so I made a pocket for the pieces like the one made for the cupcake. Unfortunately I forgot to get a photo of this page with the pieces laid on it before it got given to it's new owner...


The next tangram puzzle was of a cute little house.


And the last tangram puzzle was of a horse. I love the colours chosen for this page. It came with it's own pocket built into the page by sewing down three edges of the horse tangram outline which had been embroidered onto felt.


My sister, whose Fairy Tale Quiet Book you have already seen, contributed this I-Spy page:


Again, layer two squares of fabric over the top of each other, right sides facing up. She cut an 'x' shaped opening in the middle of the top square of fabric and folded back the edges on them. Folding them back on themselves several times is a good idea to avoid them getting in the way when trying to find items. Then she inserted a smaller square of clear vinyl underneath, sewing around the inside edge, and zig zaging around the outer edges. She used her machine to do the 'Find 10 Things' lettering at the top. Next, she sewed the two squares of fabric together leaving a 1" gap around the edges to allow for binding, as well as a small opening so she could fill the space between them with ten small items and bean bag beans. She was going to use rice, but since we had to post the pages to the host and back, she decided bean bag beans would be a lighter and therefore cheaper option.

The ten items in our I-Spy page are a small plastic baby, a flower button, a Lego block, a wooden leaf picture, a wooden drum picture, a small wooden painted peg, a small glitter button, a wooden cat head picture, a wooden number '2', and a large google eye. In other versions, she has included small plastic bugs and animals. Small shells, gum-nuts, beads, paper clips, and any small, non-sharp household items would also work well.


Here's another of my 8"x8" material pages - the Easy Peasy Lei Flower Quiet Book Page.


Before the pages were made into a book, they made awesome quilts for Elsa.


Find a tutorial link and YouTube clips of how to bind the pages and book together on my page of Quiet Book Making Tips.

How I made a closure after binding my book! Post Binding Quiet Book Closure.


Follow Faith and Felt Obsession on FacebookPinterest and You Tube

Does joining a page swap tempt you? Comment below!

Wednesday 9 March 2016

Easy Peasy Pocket Page 8"x8" Material Quiet Book

This page is so simple anyone can do it!


Materials needed to create the Easy Peasy Pocket Page for an 8"x8" material quiet book:

  • an old shirt with a chest pocket, preferably one that has a closure
  • a piece of paper to make an 8"x8" template

Make an 8"x8" template by marking 8" from the same edge at the top and bottom of a piece of paper. Line up your ruler and tear along it. Turn your paper onto the next edge to the left or right and do it again.


Place your template over a shirt pocket, lining it up so the pocket is in the center. Pin and cut it our. Don't worry if your piece has a small section of sleeve in one corner as this will get covered by binding when you sew the quiet book together. This is why your quiet book size can't be bigger than 8"x8", otherwise it might be difficult for you to find a shirt big enough. Although I guess you could add a border around the edge to make it wide enough to fit a bigger page size.


That's it!

I found a heap of old shirts at my local dump, where they give away clothes. It's also a great way to get interesting buttons and beads for free.

You can probably find a variety of pockets all with different closures, and make an entire book out of pockets recycled from old clothing.


Now, to fill them with fun activities....

  • tetris shapes made from stiffened felt
  • prism to catch the sunlight like this idea by Anne from Left Brain Craft Brain
  • a bead and fabric scrap dolly from the $2 shop
  • toy cars
  • a mirror
  • toy skateboard
  • coloured cellophane lolly wrappers to use as light filters to look through - don't get them wet though, or the colour will run and ruin your book
  • Simple puzzles using iron on transfers by Amy from Serving pink lemonade, or just print and laminate them
  • Printable lacing cards by Beck Clarke from busy Little Bugs
  • dominoes
  • a weaving rainbow by Mihaela from Best Toys for Toddlers
  • foam finger puppets from a $2 shop
  • a small slinky
  • a button snake by Jackie from happy hooligans
  • velcro cord ties from the harware section of a $2 shop to make a link chain with


The pocket on the left with pink edging came from one of my husband's old shirts that he wore a lot when we first met. It was my favourite, and I fixed it when it got a massive rip in the back and my husband kept wearing it! When he put it in the chuck out pile recently, I quickly saved it for this project.

Here's some more of my 8"x8" material pages:

The Easy Peasy Lei Flower Quiet Book Page.

Puzzle Quiet Book Page Swap.


Follow Faith and Felt Obsession on FacebookPinterest and You Tube

Does this page look easy enough for you? Comment below!